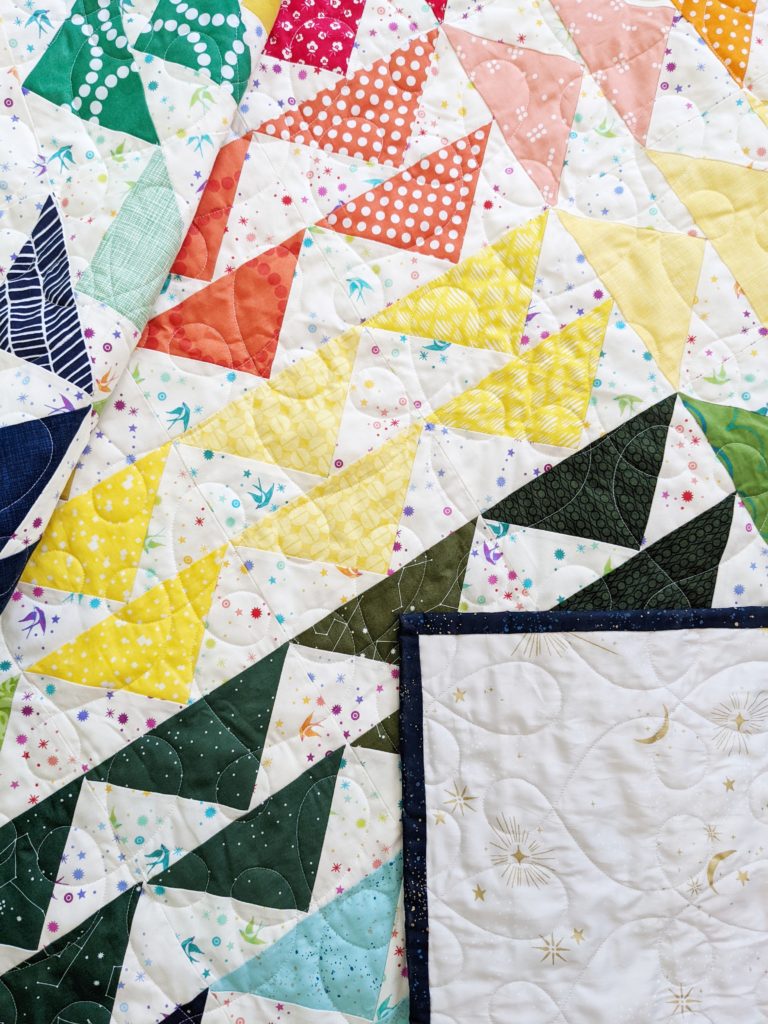
Flying Geese quilt blocks are a classic quilting pattern that can be used to create a variety of quilts. They are also a great way to use up scraps of fabric. In this guide, we will show you how to make Flying Geese quilt blocks using the four at a time method.
Materials:
- Fabric: You will need two different fabrics for this project. The amount of fabric you will need will depend on the size of your Flying Geese blocks.
- Rotary cutter
- Ruler
- Cutting mat
- Non-permanent marking tool (chalk pencil or water erase pen)
- Ultimate Flying Geese Tool (highly recommended, but not required)
The Four at a Time Method
The four at a time method is a great way to make Flying Geese quilt blocks quickly and easily.
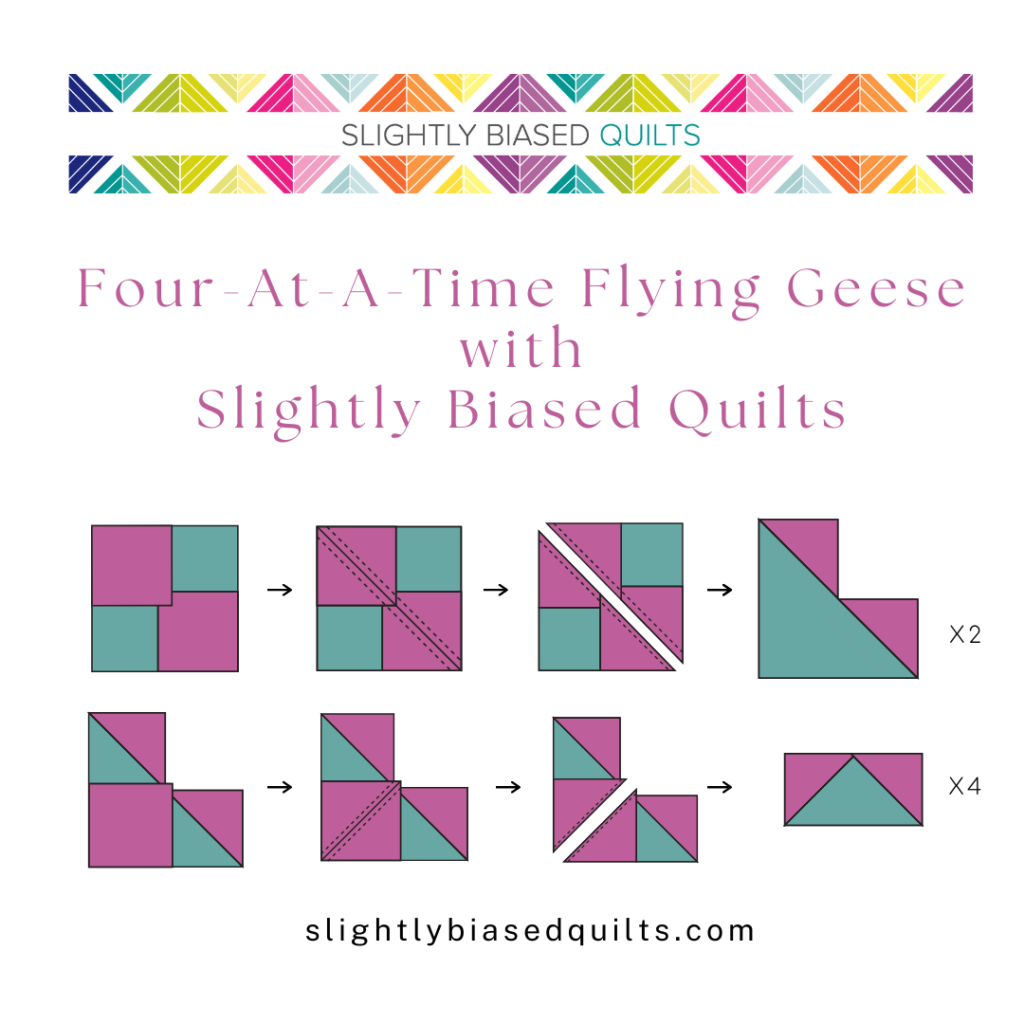
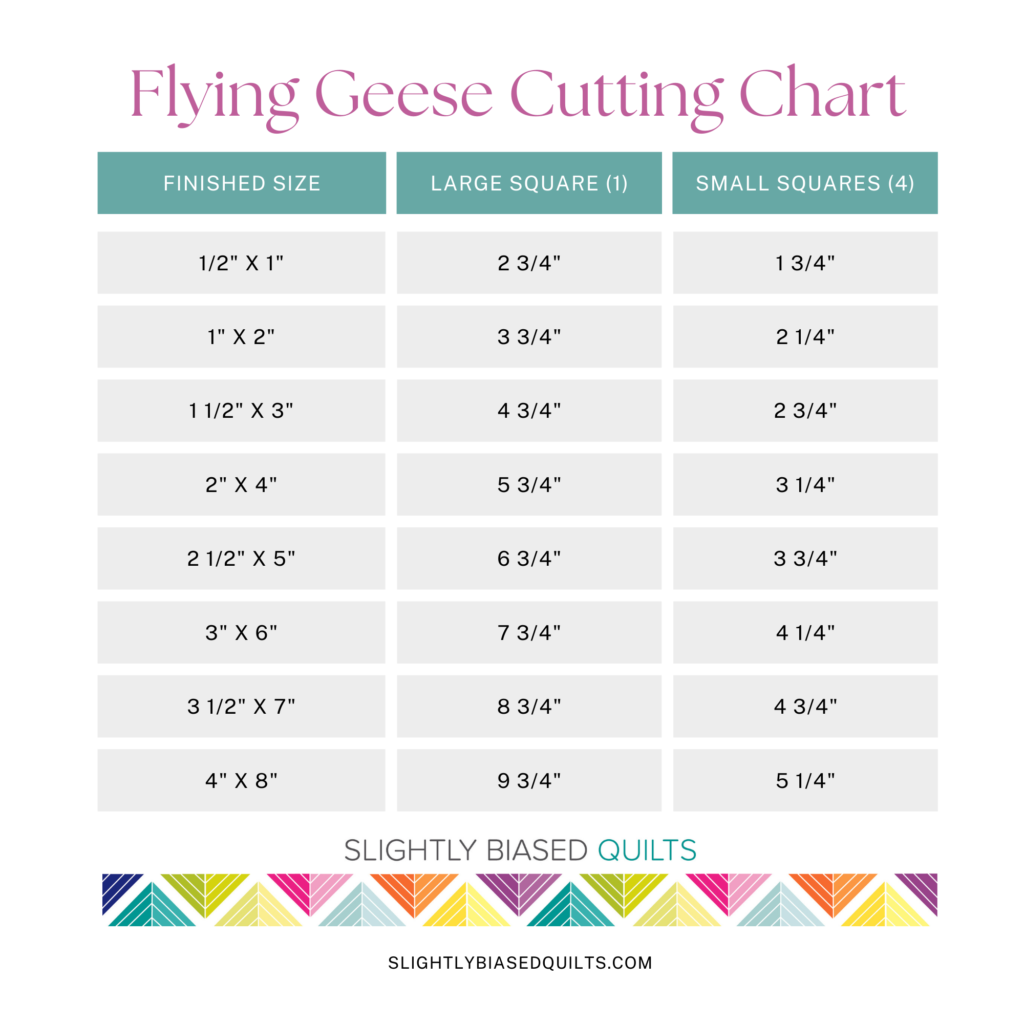
- Start with 4 small squares and one Large square. Place 2 small squares on the large square in opposite corners and draw a line through the center of both squares corner to corner.
- Sew a scant quarter inch seam on either side of the line, then cut along the line.
- Press both pieces open, then place a small square on the corner of the original large Square and draw a diagonal line from corner to corner.
- Sew a scant quarter inch on both sides of the line then cut along the marked line. Press open and trim to size using the Ultimate Flying Geese Tool to complete the Flying Geese.
Ready for more practice? My Radian pattern is perfect for building your flying geese skills! You can even use up some of your scraps.
Tips:
- Use a sharp rotary cutter and a ruler to make accurate cuts.
- Press your seams as you go to help prevent puckering.
- Be sure to trim your blocks after you sew them together to ensure that they are the correct size.