A trusty rotary cutter is an essential versatile tool that can streamline your cutting process and elevate the precision of your quilt blocks. Whether you’re a seasoned quilter or just starting out, mastering the use of a rotary cutter opens up a world of possibilities for creating stunning quilts with ease and efficiency.
The Perfect Tools for the Job
When quilting, having the right tools can make all the difference. I’ve experimented with various rotary cutters and rulers over the years, and I’ve found a few favorites that have become essential components of my quilting toolkit.
When it comes to rotary cutters, I swear by the ergonomic Olfa rotary cutter—the one with the yellow handle and convenient lock feature. Not only does it provide a comfortable grip for long cutting sessions, but the safety lock adds an extra layer of protection when the cutter is not in use. Plus, the sharp blade effortlessly glides through multiple layers of fabric, making it a breeze to tackle even the most intricate quilting projects.
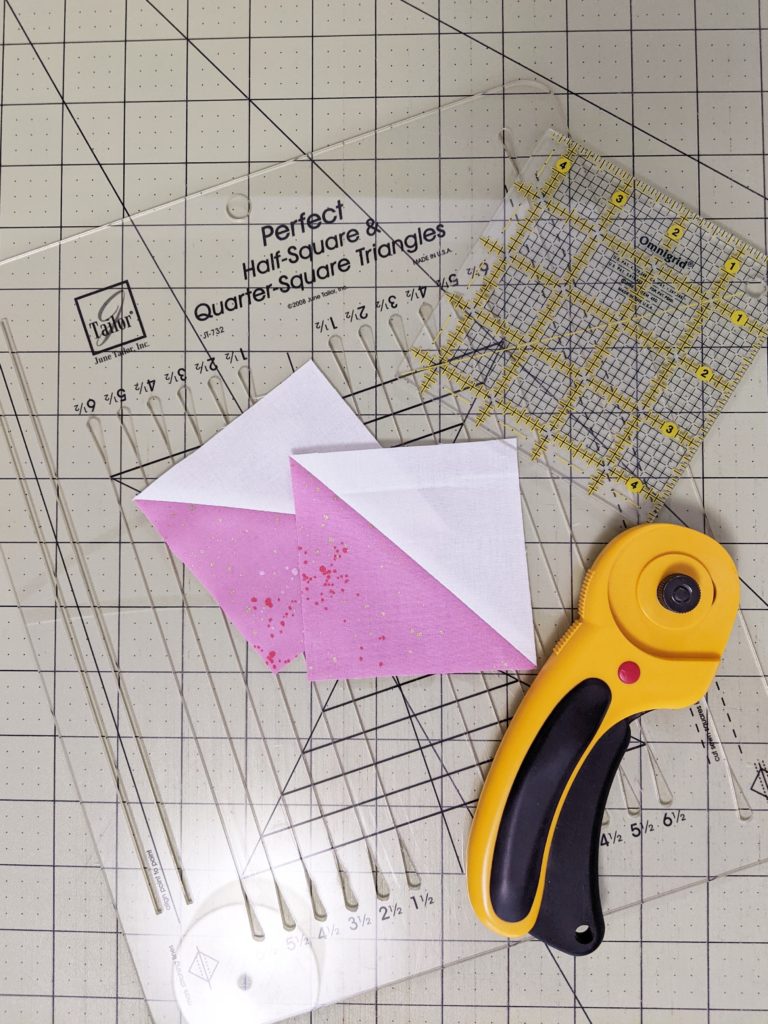
Now let’s talk about rulers. The June Tailor Perfect HST ruler and the Ultimate Flying Geese trimmer are absolute game-changers when it comes to creating precise half-square triangles and flying geese units. With built-in guidelines and easy-to-read markings, these rulers take the guesswork out of cutting and trimming, ensuring that your blocks come together seamlessly every time.
Choosing the Right Mat
While I’m not particularly picky when it comes to cutting mats, I’ve found that Olfa mats offer reliable durability and a smooth cutting surface. Whether you prefer a self-healing mat or a double-sided mat with grid lines for added precision, investing in a high-quality cutting mat is essential for protecting your work surface and prolonging the life of your rotary blades.
(Pro tip: Don’t forget to replace your blades after each project. You’ll be so glad you did.).
Mastering Cutting Techniques
Now that you have the perfect tools in hand, let’s dive into some essential cutting techniques to help you achieve professional-looking results in your quilting projects.
- Proper Grip: Hold the rotary cutter firmly but comfortably, keeping your fingers away from the blade. Use your non-dominant hand to steady the ruler and guide the cutter along the edge of the fabric.
- Smooth Motion: Apply steady pressure as you glide the rotary cutter across the fabric, using long, fluid strokes for clean, straight cuts. Avoid stopping and starting mid-cut, as this can result in jagged edges or uneven lines. Using a surface that is counter height and standing for cutting makes a big difference.
- Mindful Measurement: Take your time to accurately measure and mark your fabric before cutting, using high-quality rulers like Omnigrid for precise results. Double-check your measurements and alignment to ensure that your pieces will fit together perfectly in your quilt blocks. Focus on measuring with your ruler instead of your mat to avoid wearing out your mat in the popularly measured increments.
- Safety First: Always remember to engage the safety lock on your rotary cutter when not in use, and store it in a safe place away from children and pets. Replace dull blades promptly to prevent injuries and maintain optimal cutting performance.
By incorporating these tips and techniques into your quilting practice, you’ll soon discover the joy and satisfaction of using a rotary cutter to create beautiful, quality quilts. Whether you’re piecing together intricate blocks or cutting fabric for borders and bindings, having the right tools and mastering essential cutting skills will empower you to unleash your creativity and bring your quilting visions to life. Happy quilting!