Half Rectangle Triangles (HRTs) are a versatile building block in modern quilting, lending themselves beautifully to dynamic layouts, bold geometric designs, and creative experimentation. If you’ve worked with HRTs before, you know that their directional nature often complicates the process. Traditional methods yield two of the same orientation—two lefts or two rights—when sometimes all you need is a perfectly matched pair: one left and one right.
Enter this new method! Designed specifically for quilters looking to streamline their HRT production, it ensures you’ll end up with exactly what you need, no extra cutting or guesswork required. If you’re assembling a dynamic quilt layout that requires HRTs in complicated sizes or in left/right (mirrored) pairs, this technique saves time and fabric while giving you precise results.
Ready to dive into the details? Follow the step-by-step instructions below to learn how to create perfectly mirrored HRTs every time.
Your first task is to calculate the size of squares you will need. This handy-dandy calculator on the right will do all the fancy math for you! Enter in the finished size of HRT that you want to make, and it will give you the size of squares you will want to have.
Once you have the size of your squares, you will want to start off as if you are making half square triangles, except you will not trim them.
- Place one square Color 1 fabric and one square Color 2 fabric RST and mark the wrong side of the Color 1 fabric on the diagonal with a disappearing pen.
- Sew ¼” away from the diagonal on both sides. Cut the fabric on the marked line and press each piece, pressing seam open.

Mirrored HRT Calculator
Enter the finished size of your HRT with the smaller side as the width:
Cut Square Size: "
Next up, you’ll need to gather your supplies. You will need your two untrimmed HSTs, a ruler, some washi tape, and a rotary cutter. Your ruler will need to be at least as big as your longest HRT side. For example, to make a 3″ x 6″ finished HRT, you will need a ruler at least 3.5″ x 6.5″.
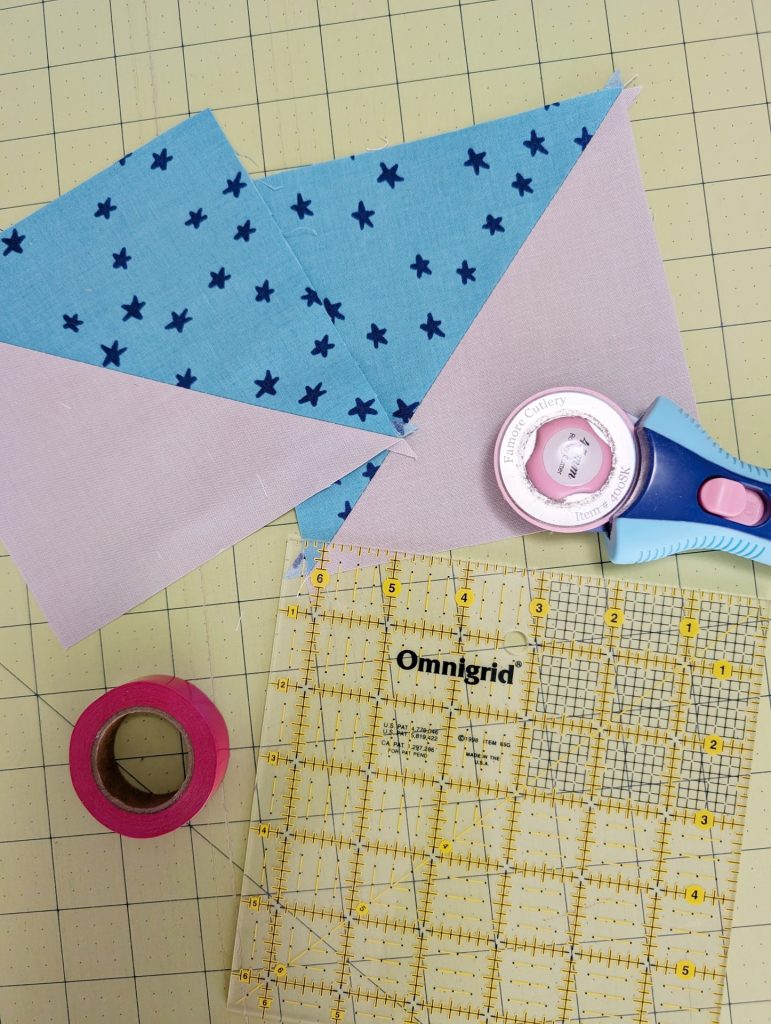
Take some washi tape and mark the unfinished size you need for your HRT. In this example, I’m making a 2.5″ x 3.5″ HRT, so I put my tape at the 4″ and 3″ lines to block out my rectangle size. NOTE: It doesn’t matter which side you place the width and length in this step. Either way will work!
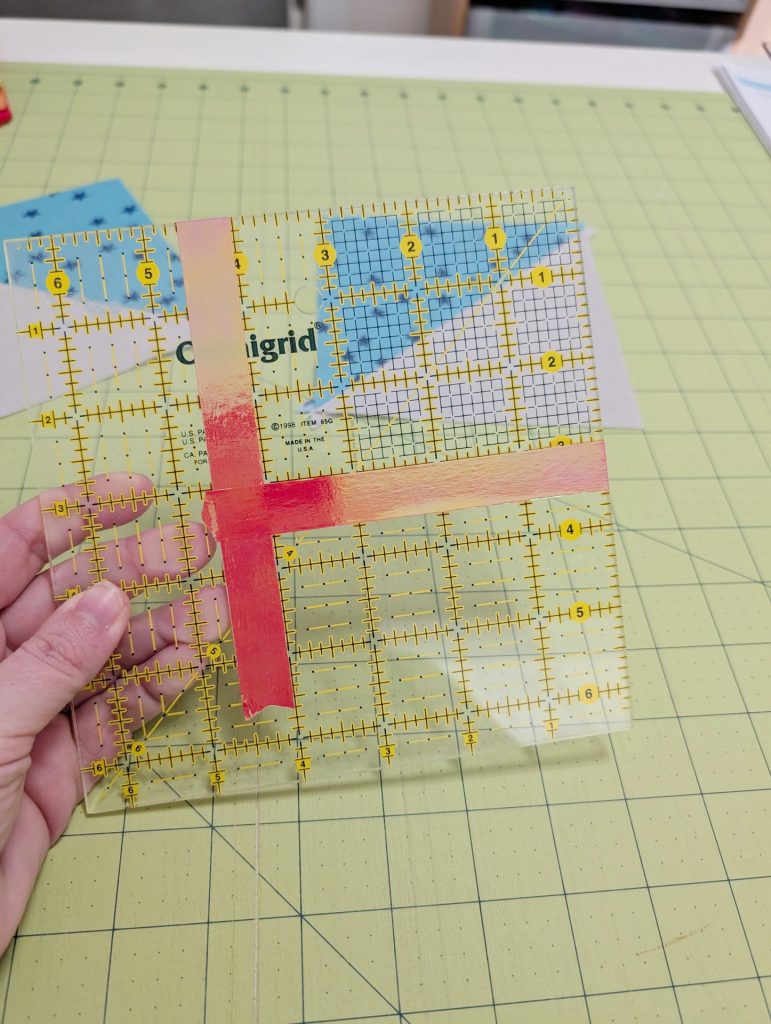
Next up, you will place one additional strip of washi tape on your ruler to line up your diagonal. However, you don’t want to use the exact diagonal here – that would result in your points not being exactly in the corners! Your diagonal needs to be from the (1/4″, 1/4″) point on the ruler to the (Length – 1/4″, Width – 1/4″) point. For example, for my 4″ x 3″ unfinished HRT, I will want a line from the (1/4″, 1/4″) point to the (3 3/4 “, 2 3/4”) point. This is your custom HRT diagonal that you will use to line up for trimming, and it makes sure you have enough seam allowance around your HRT to maintain your points!
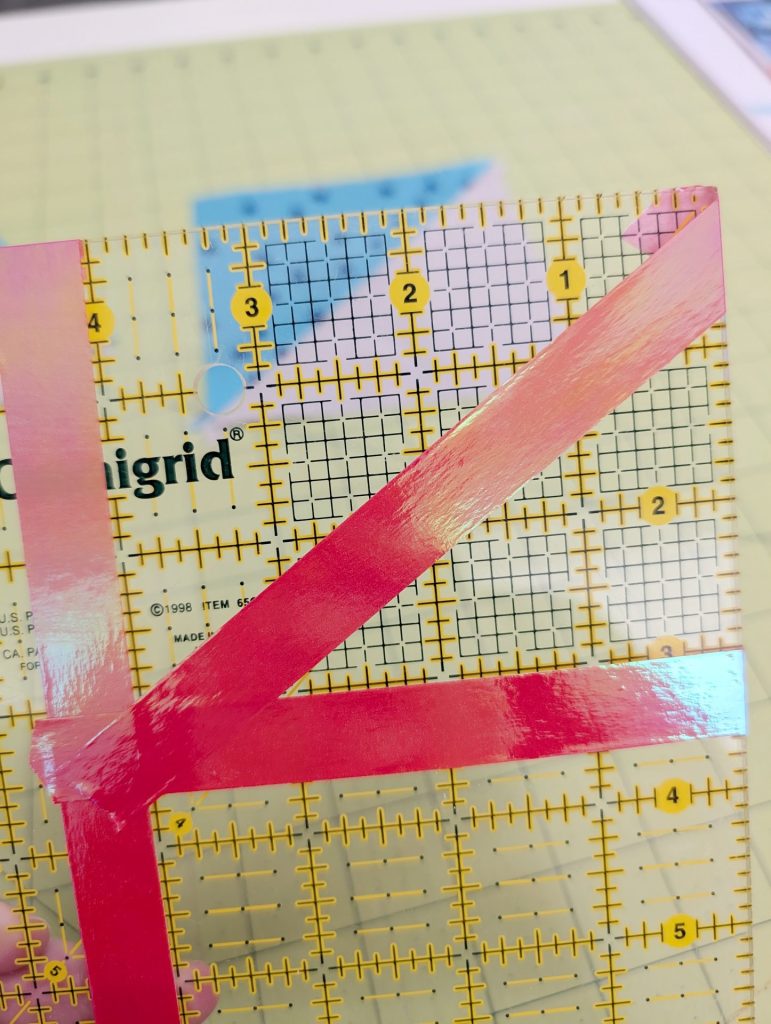
Now you can line up one of your HSTs along the diagonal and trim, making sure your entire marked-off rectangle overlays the fabric. Double check all the corners to make sure you don’t lose a corner!
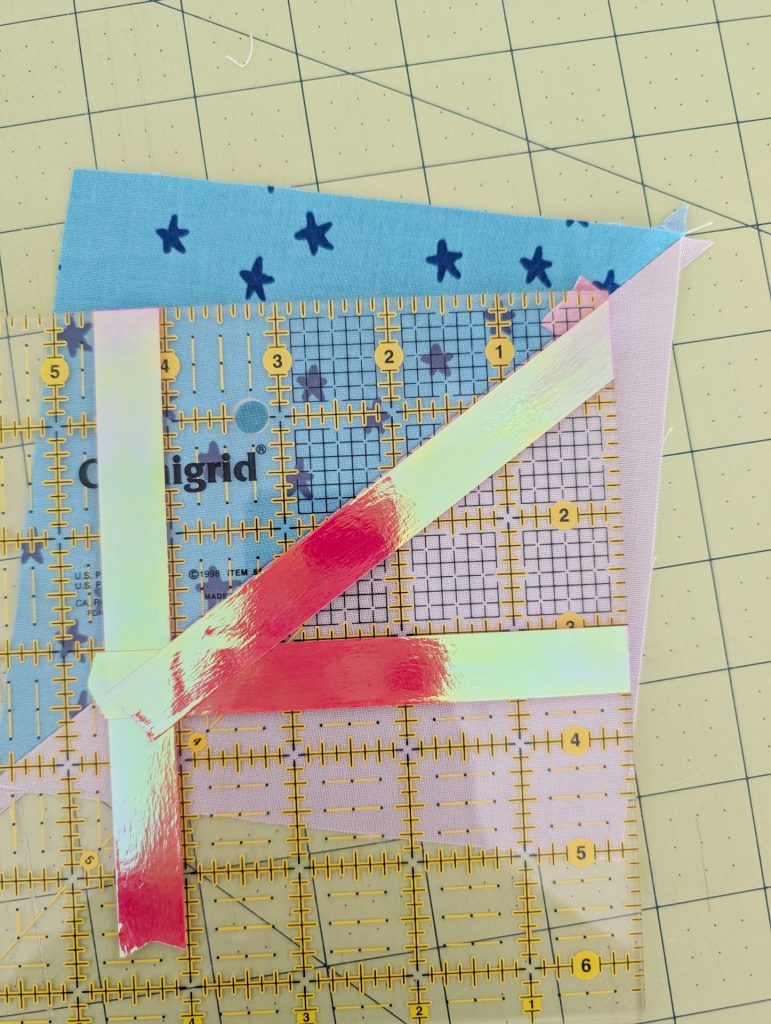
Trim the top and right size, rotate your HRT around, and repeat on the other two sides, lining up your fresh cuts along your marked-off rectangle sides.
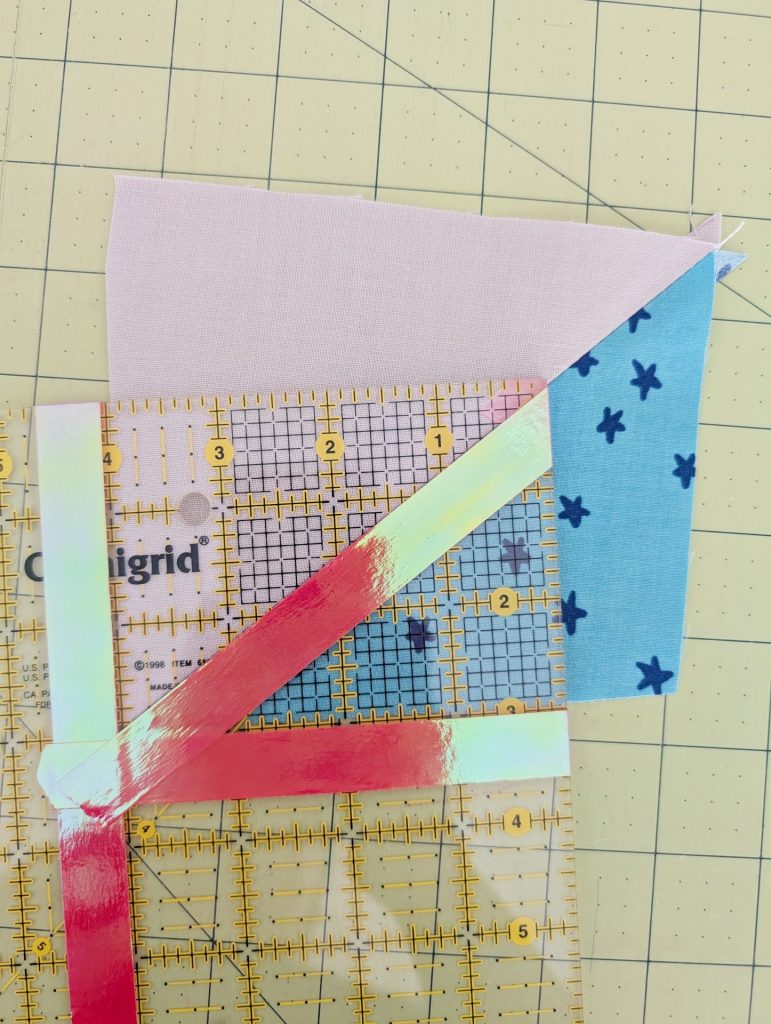
That gives you one HRT! To make the second mirrored HRT, you need to move your diagonal to the other direction. This time, your diagonal needs to be from the (Length – 1/4″, 1/4″) point on the ruler to the (1/4″, Width – 1/4″) point. For example, for my 4″ x 3″ unfinished HRT, I will want a line from the (3 3/4″, 1/4″) point to the (1/4 “, 2 3/4”) point.
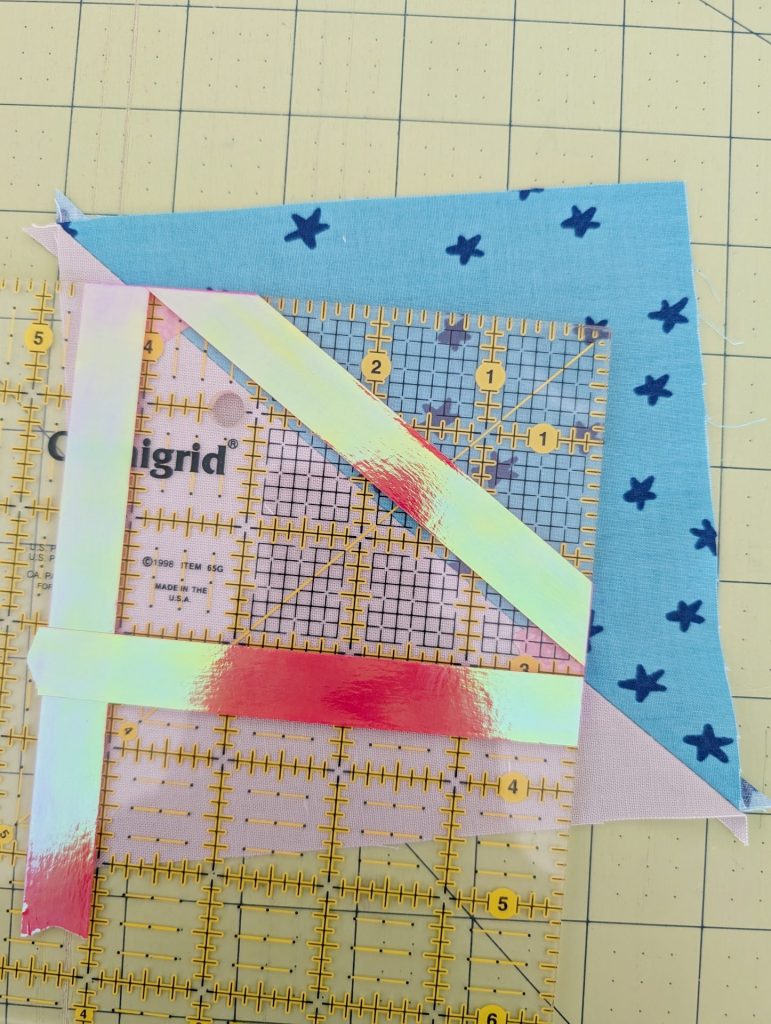
Repeat your trimming on the second HST to turn it into an HRT. And voila, you now have a pair of mirrored HRTs!
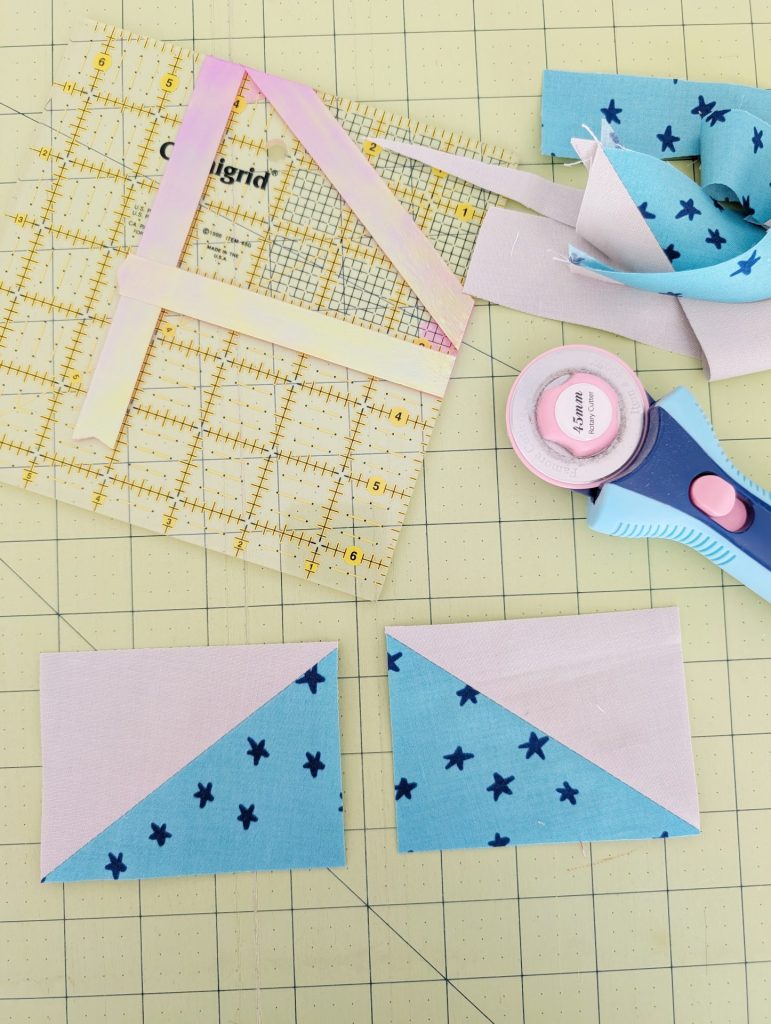
Say goodbye to mismatched triangles and wasted fabric! This method for creating half rectangle triangles is a game-changer for quilters who want one left and one right triangle without the hassle. It’s an efficient, beginner-friendly approach that ensures every piece you cut has a purpose in your quilt.
So the next time your project calls for these directional beauties, give this technique a try—you’ll love the precision, simplicity, and creative freedom it offers. Happy quilting!
