Getting to Know EQ8: Using Digital Tools for Modern Quilt Creation
Designing quilts has never been easier, thanks to EQ8 (Electric Quilt 8)! This powerful quilting software allows you to create, modify, and visualize quilt designs before cutting into your precious fabric. With all the talk of color on the blog lately, you may want to experiment with color palettes. You can also try out different block arrangements or draft a completely original quilt. EQ8 streamlines the process without the need for a steep learning curve like some Adobe softwares.
In this tutorial, we’ll go step by step through drafting a simple quilt in EQ8—perfect for beginners or those looking to refresh their skills!
How to make a quilt in EQ8
Step 1: Open EQ8 and Start a New Quilt
Open the EQ8 quilting software on your computer.
1A. Create a New Quilt From the home screen, select “Create a New Quilt” to begin your project.
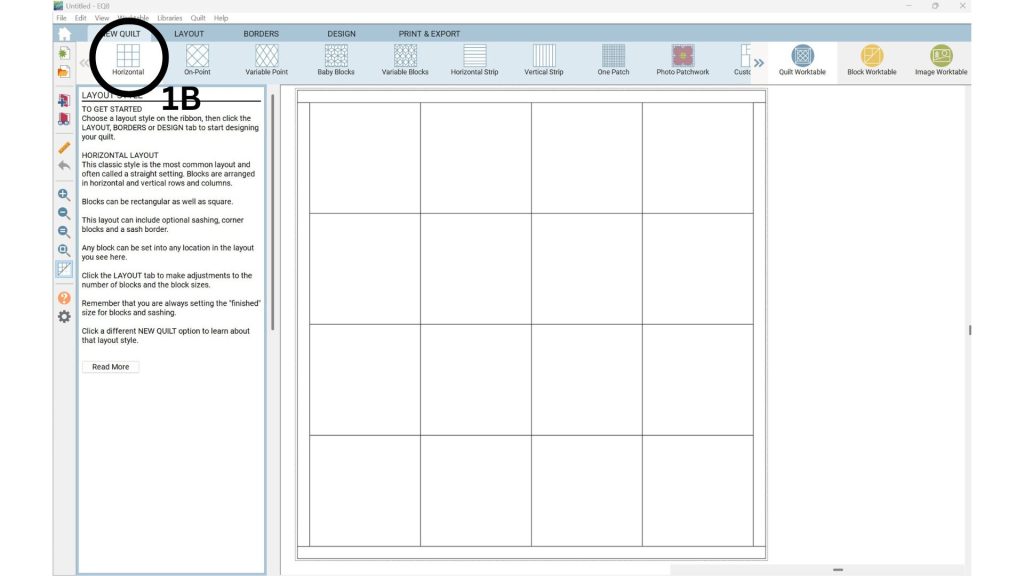
1B. Choose a Quilt Layout Select a quilt layout option. For a beginner-friendly design, choose “Horizontal“.
Step 2: Adjust the Quilt Layout
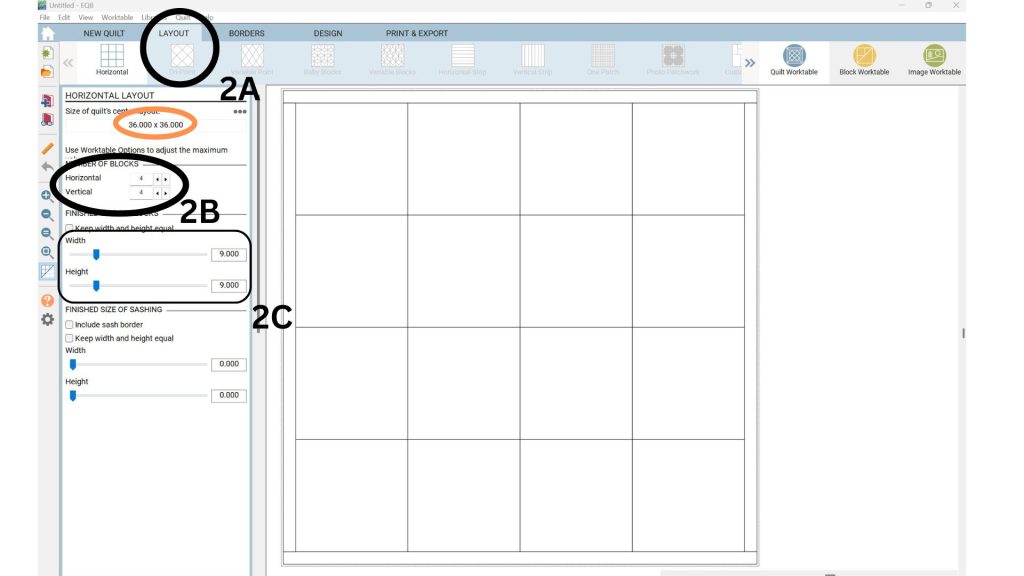
2A. Access the Layout Tab Click on the “Layout” tab in the toolbar of your quilting software.
2B. Set Block Grid Specify the number of blocks per row and column (e.g., 5 x 5 for a simple lap quilt).
2C. Adjust Block Size Modify the block size to match your desired quilt dimensions (circled in orange), ensuring the layout fits your project.
Step 3: Choose or Create Blocks
3A. Access the Block Worktable Navigate to the “Block Worktable” in your quilting software to begin designing or selecting blocks.
3B. Select a Design Mode Choose “EasyDraw” for simple, pieced block designs.
Choose “PolyDraw” for more complex, custom shapes.
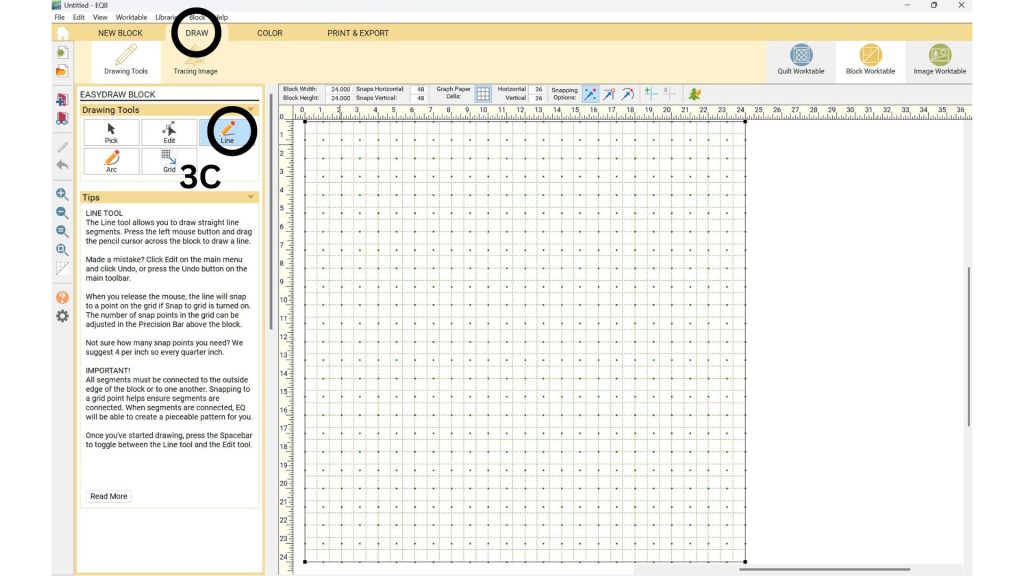
3C. Create Blocks Use the drawing tools to design a new block from scratch in the selected mode.
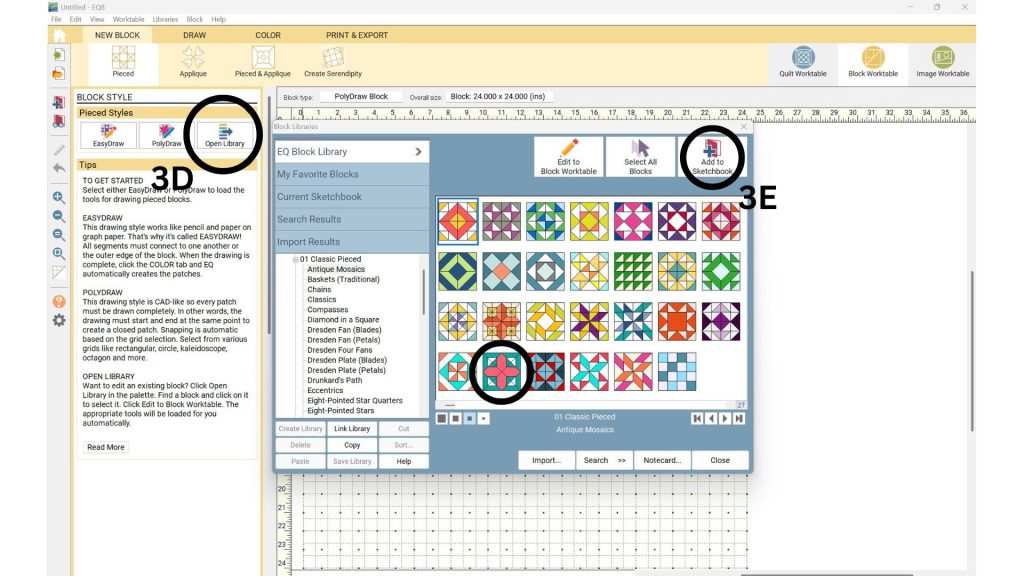
3D. Browse Blocks Browse the block library by clicking “Library” > “Block Library” to explore EQ8’s extensive collection.
3E. Add or Edit Blocks To use a library block as-is, select it and click “Add to Sketchbook” to save it for your quilt.
To customize a library block, double-click it to open it in the Block Worktable for editing.
Step 4: Add Color & Fabrics
4A. Select the Color Tab Navigate to the “Color” tab in your quilting software to begin adding colors and fabrics.
4B. Choose Solids or Import Fabrics Use solid colors from the palette or import fabric swatches from the Fabric Library.
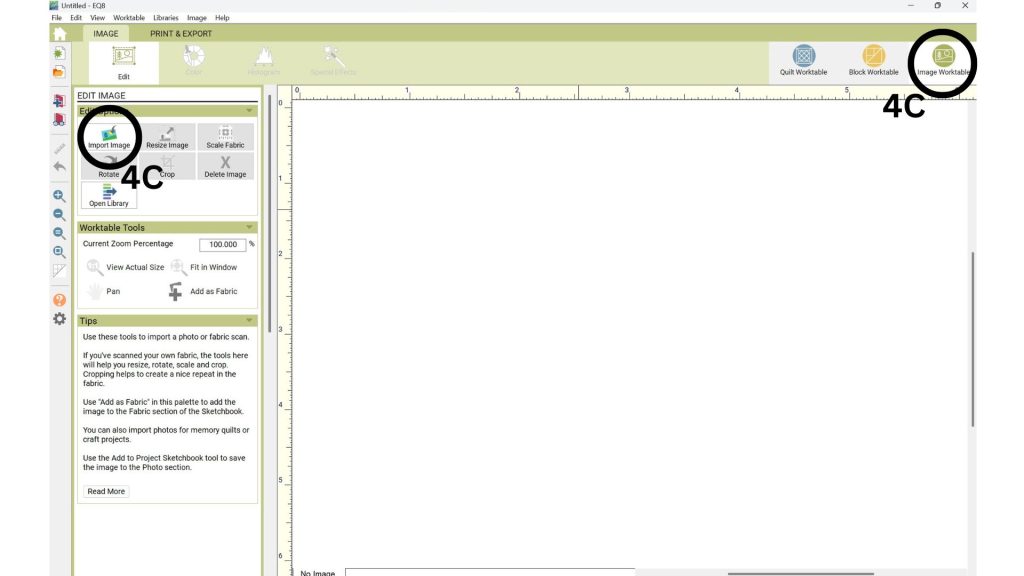
To import a swatch: Click the “Image Worktable” in the top right-hand corner.
4C. Import Swatches Select “Import” and choose a swatch (e.g., one from FatQuarterShop.com).
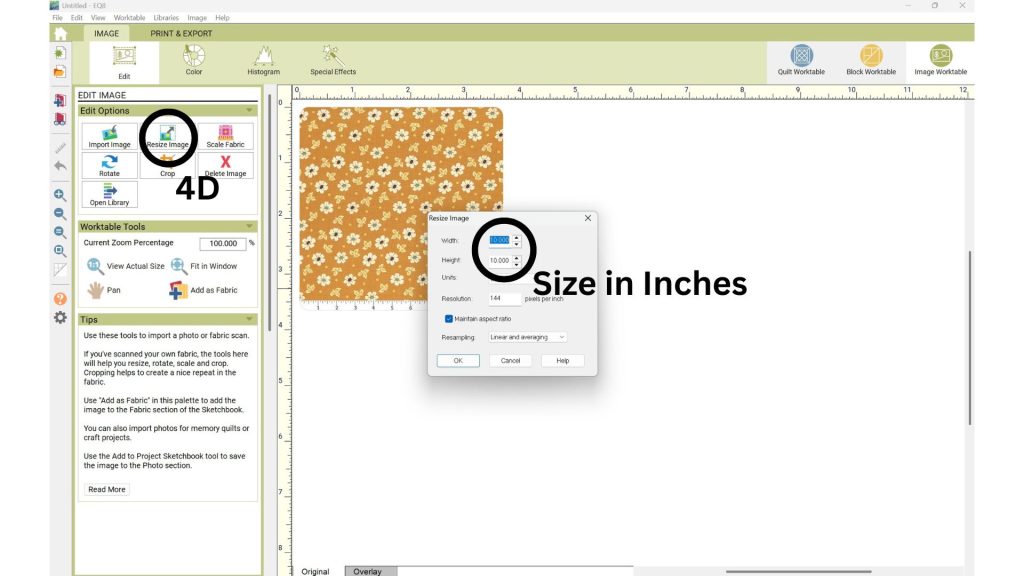
4D. Resize Prints for Accurate Scale Click “Resize” and input the correct inch measurements.
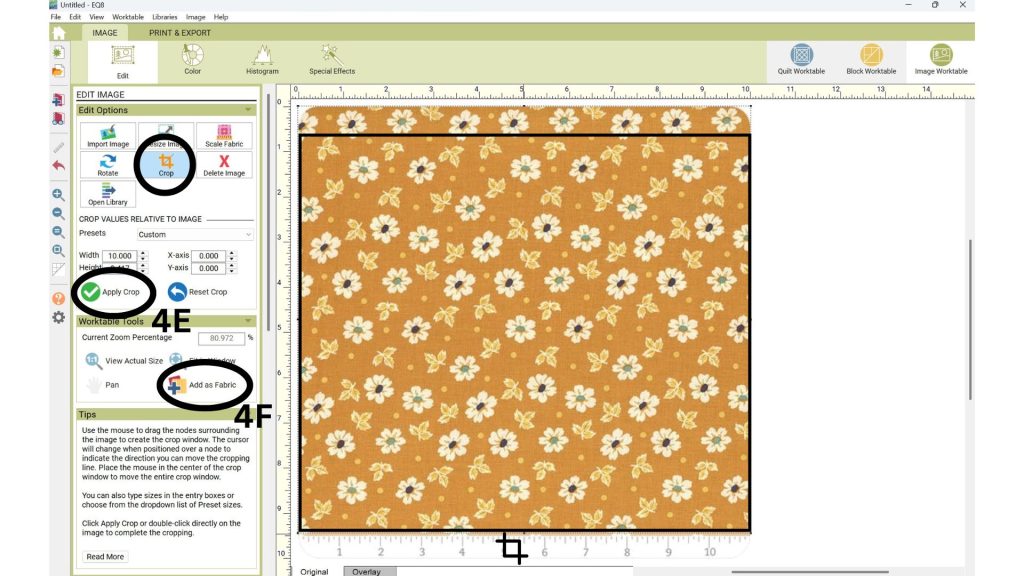
4E. Crop Swatches Click the “Crop” to crop out the ruler and rounded edges of swatch. move the border of the crop to include the areas you want to keep.
Click apply once your crop is correct.
4F. Add Fabric to Library Click “Add as Fabric” to save the swatch.
Repeat for additional fabrics.
Pro Tip: Upload a photo of a fabric from your stash to the Worktable for custom swatches.
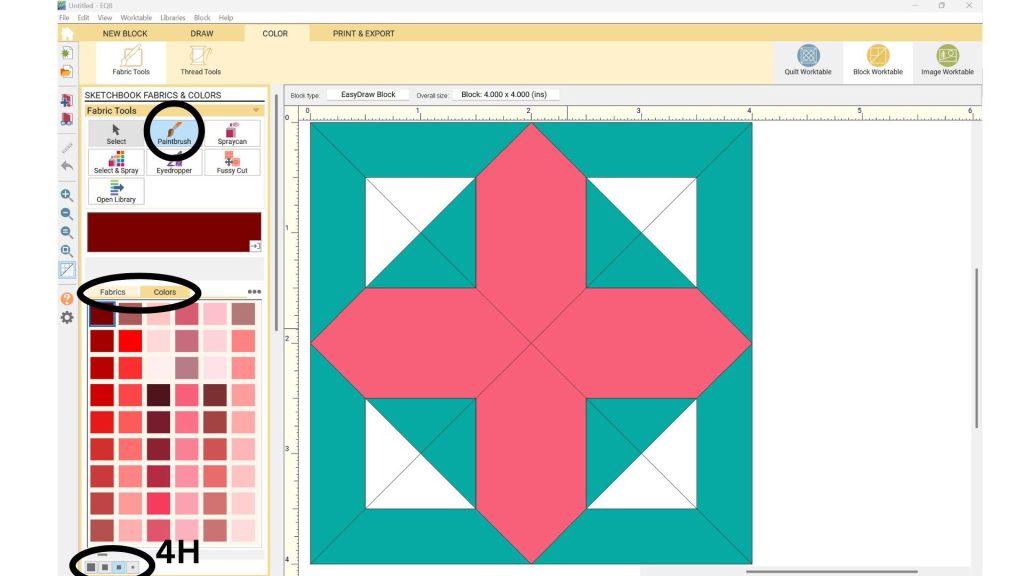
4G. Color Your Quilt Block Select the “Paintbrush Tool” from the toolbar.
Choose a fabric swatch from your uploaded library or solid colors.
Click on the quilt block areas you want to fill with the selected swatch.
Repeat until your block is fully colored to your liking.
4H. Manage Swatches and Views Toggle between “colors” and “fabrics” swatches using the tabs at the top of the palette.
Scroll to view more swatches.
Adjust swatch preview sizes by selecting the varying square sizes in the interface.
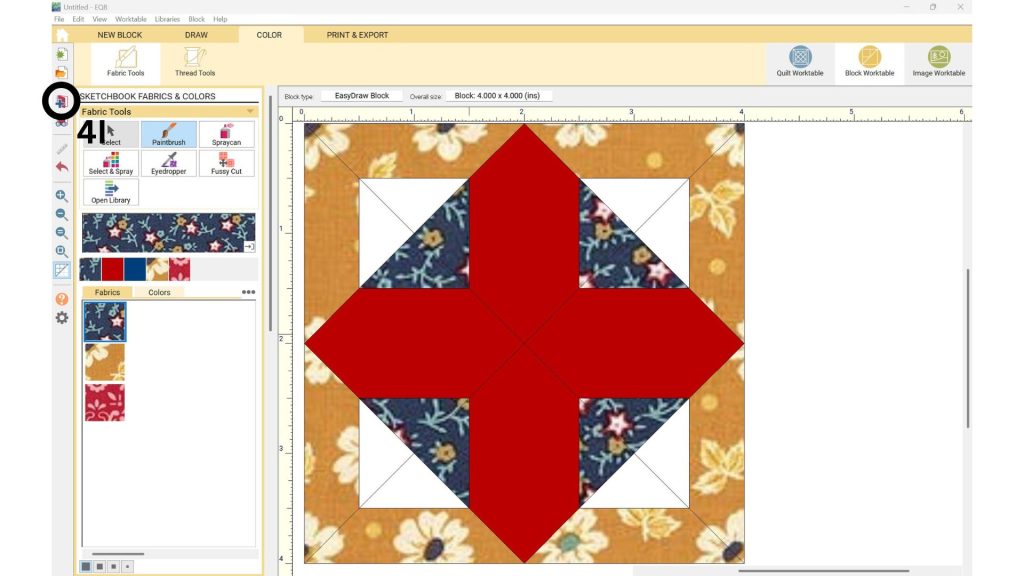
4I. Save Your Design Click “Add to Sketchbook” to save your colored block. This ensures it appears with your custom colors when you continue working on your quilt.
Step 5: Arrange Blocks in the Quilt Layout
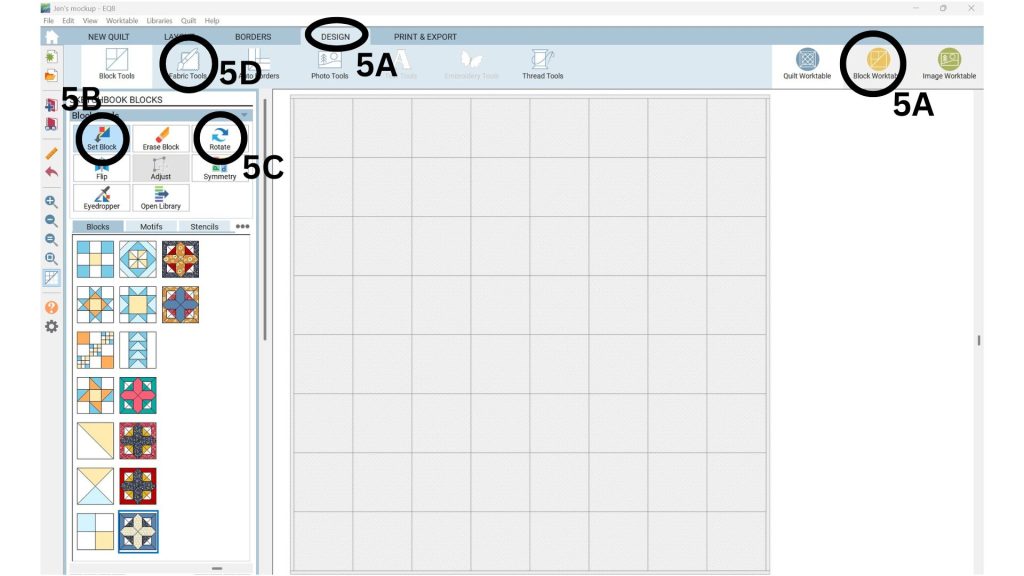
5A. Access the Quilt Worktable Navigate to the “Quilt Worktable” in your quilting software and select the “Design” tab.
5B. Place Blocks in the Layout Using the “Set Block” Tool, drag and drop blocks from the block palette into your quilt layout grid.
Arrange the blocks to create your desired pattern.
5C. Experiment with Block Variations Use the “Rotate” or “Flip” blocks to add visual interest to your design.
5D. Recolor Blocks (Optional) To explore different color combinations, click the “Fabric Tools” tab at the top.
Select the “Paintbrush Tool,” choose a fabric or solid color, and click on block areas to recolor.
Repeat until you’re satisfied with the color scheme.
Step 6: Save and Export Your Quilt Design
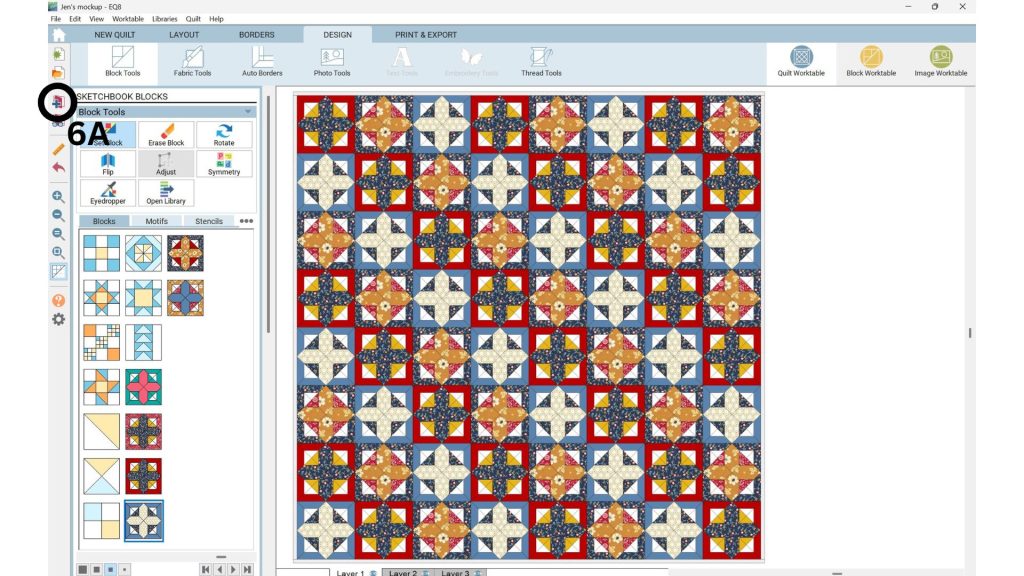
6A. Save to Sketchbook Click the “Add to Sketchbook” button to save the current version of your quilt design. When clicked, this button makes a whoosh sound indicating that it has been added.
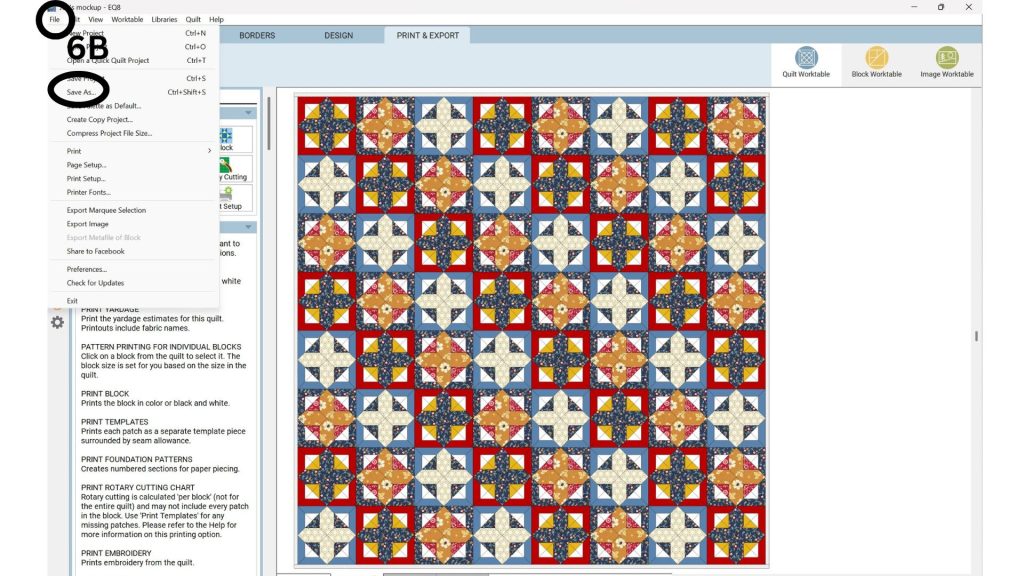
6B. Save Your Design When satisfied with your design, click “File” > “Save As” to store the project file on your computer.
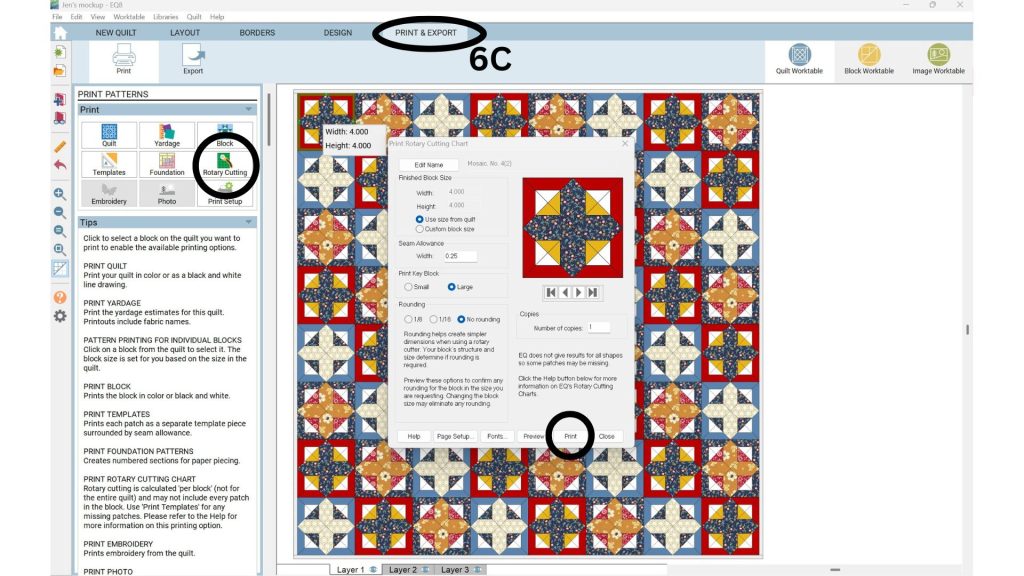
6C. Print Cutting Instructions Navigate to “Print & Export” tab > “Rotary Cutting” to generate and print detailed cutting instructions for your quilt.
6D. Export as Image To share your design, go to “Print & Export” tab > “Export Image” to save your quilt design as an image file.
EQ8 is an amazing tool for quilters who want to explore modern design ideas before committing to fabric. Whether you’re testing out gradients, transparency effects, or minimalist layouts, this software gives you the creative freedom to experiment.
Have you used EQ8 before? Let me know in the comments what features you are most excited to try!