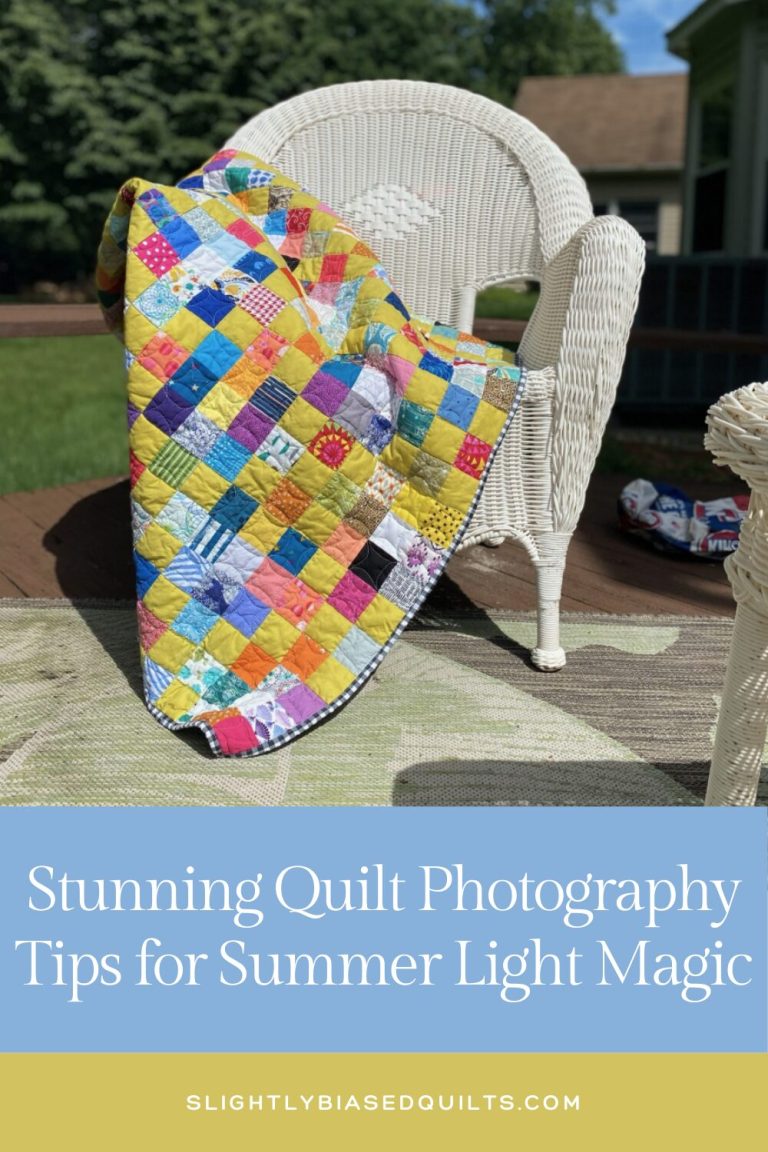
Stunning Quilt Photography Tips for Summer Light Magic
Capture Your Quilts in the Best Light—Literally!!
There’s something magical about summer light. It has a softness at sunrise, a vibrancy in the midday sun, and a golden warmth that wraps everything in charm during the evening hours. If you’ve ever wanted to photograph your quilts in a way that really feels like summer, now’s the perfect time to do it.
Whether you’re snapping a quick shot for Instagram or capturing your finished quilt for a portfolio or blog, here are my favorite tips for photographing quilts in natural summer light—plus ideas for outdoor settings, styling, and simple editing that can make all the difference.
☀️ 1. Chase the Golden Hours
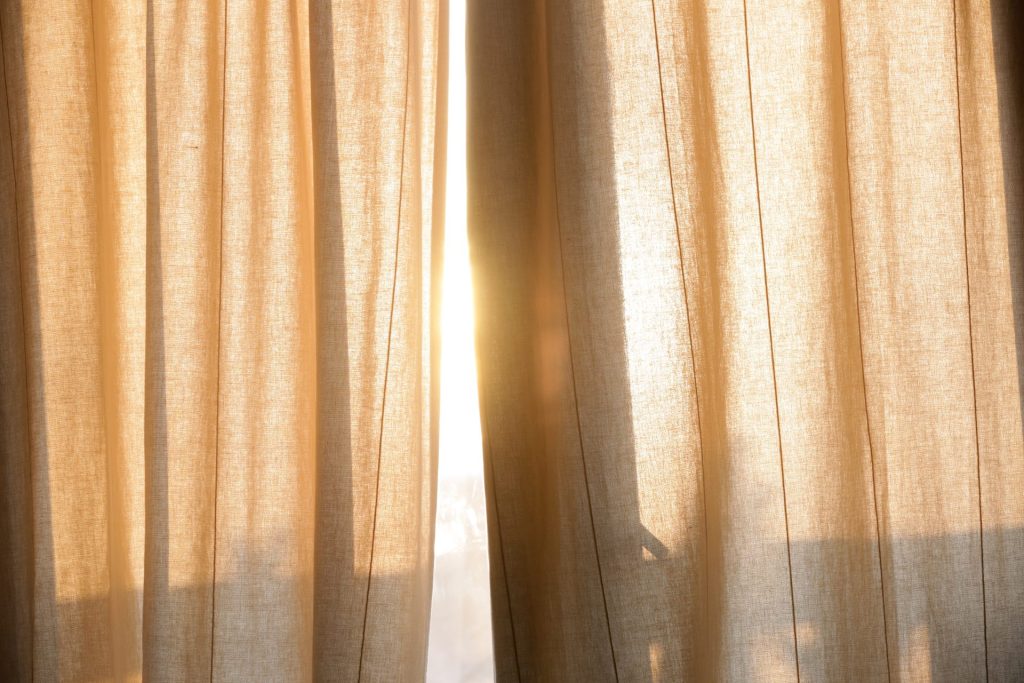
The best lighting for quilt photography is usually the hour after sunrise and the hour before sunset—often called “golden hour.” During this time, the light is soft, warm, and angled, creating fewer harsh shadows and a beautiful glow that enhances your quilt’s colors and textures.
Avoid midday light unless it’s overcast, as it can cause glare, deep shadows, and washed-out colors.
Pro Tip: If you must shoot mid-morning or early afternoon, find open shade (under a tree, on a porch, or beside a building) for even lighting.
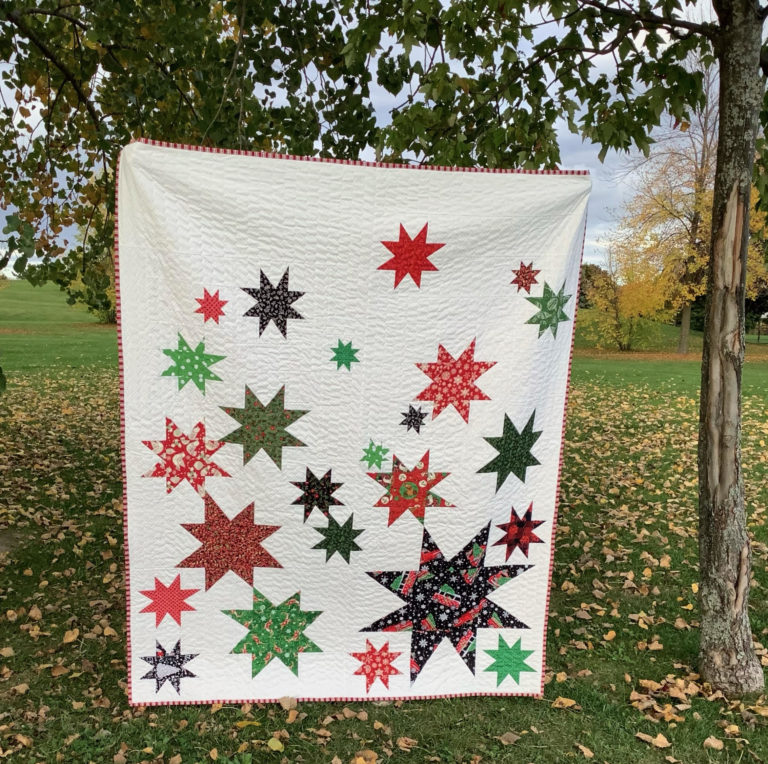
🌿 2. Pick the Perfect Outdoor Setting
Summer is full of vibrant backdrops that add seasonal charm to your quilt photos. Here are a few ideas that pair beautifully with quilted textures:
Tall grass or meadows for a natural, airy vibe
Fences or barn walls for rustic texture and height
Beach scenes or dunes for calm neutrals and sky contrast
Backyard setups with chairs, swings, or picnic tables
Clothesline shots for a breezy, nostalgic feel
Old doors or garden gates for a cozy, cottage-core look
When photographing on the ground, bring a clean sheet to protect your piece from dirt, or layer it over a basket, bench, or vintage ladder for dimension.
📐 3. Play with Composition
You don’t have to photograph the entire quilt every time! In fact, close-ups and detail shots can often be very compelling.
Try:
Focusing on a single block or unique piecing detail
Capturing the quilting texture at an angle to show the stitches in sunlight
Folding or draping the quilt to highlight color transitions
Flat lays on neutral surfaces like a white sheet, wood deck, or grass
For full shots, stand directly above or square in front of your quilt to avoid distortion. Use a step stool if needed to get a centered top-down view!
📸 4. Use Your Phone Like a Pro
Modern smartphones are amazing for quilt photography—no fancy camera needed! A few simple habits make a huge difference:
Clean your lens before shooting (seriously, do this every time!)
Tap to focus on your quilt and adjust exposure by sliding your finger up or down
Use grid lines to help keep your image level
Avoid zooming in—instead, step closer to maintain clarity
Optional Tip: Use the portrait mode to capture quilts in styled settings with a softened background.
🎨 5. Simple Editing Tricks
Editing can enhance what’s already beautiful—just don’t overdo it. Here are some beginner-friendly steps:
Brighten the photo slightly to mimic the feel of natural light
Adjust contrast to make the quilt pop without distorting the colors
Warm up the tones for that signature summer glow
Crop and straighten to frame your quilt just right
Apps like Canva, Lightroom Mobile, or even your phone’s built-in editing tools are easy to use and powerful for quick touch-ups.
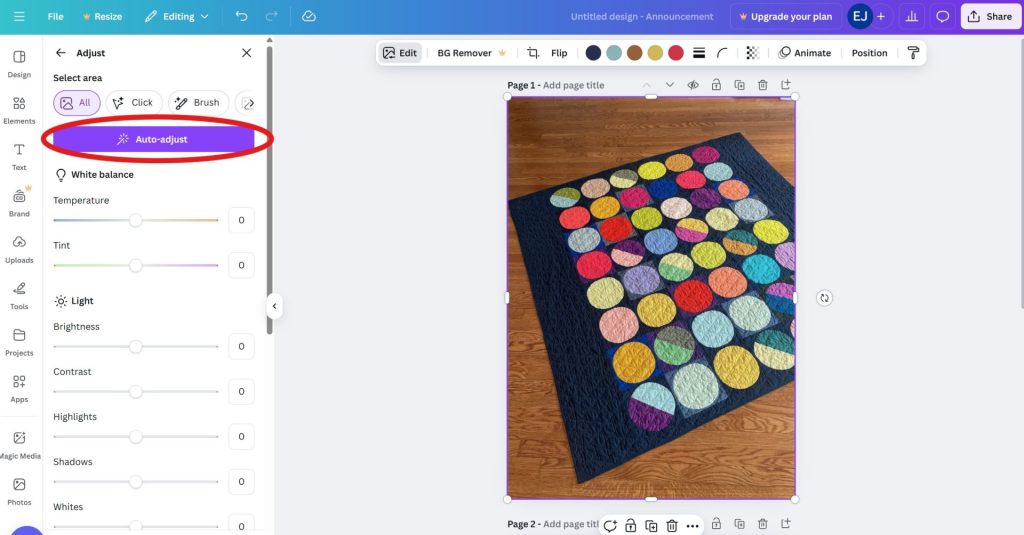
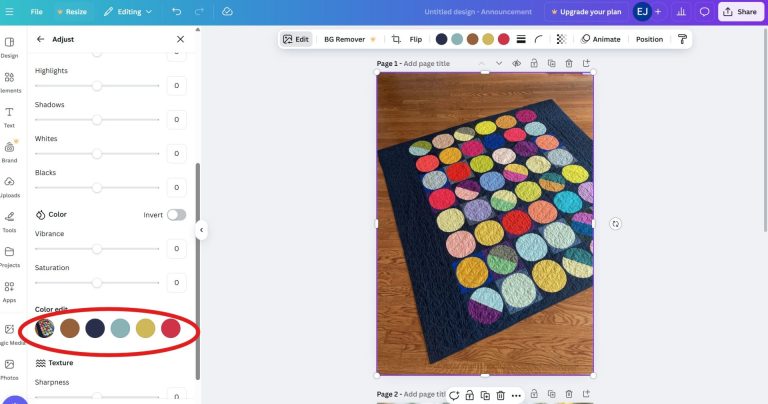
Canva in particular has a tool in their photo editing panel that allows you to select pieces of the photo and adjust the colors and light for that one area of the photo.
Click the edit button to explore the editing tool. Adjust is a great place to start.
You can auto adjust the photo with the purple button or you can play with the sliders to adjust light levels and more.
Sometimes colors don't come across as true to life in a photo. Use this section to adjust specific colors.
By selecting the foreground or background you can adjust light, colors and even focus. It can be difficult to achieve a soft out-of-focus background but you can use these tools to create the effect digitally.
Before - this is a good photo. The orange hue to the floor is a slightly distracting
After - With just a few adjustments the floor can be altered to help the quilt pop!
💡 Bonus Tip: Add Human Touches
Don’t be afraid to include a hand, a barefoot toe peeking out, or a child holding the corner of a quilt. These little details bring warmth, movement, and life to your photos—especially in summer when things feel light and free.
📷 Make the Most of Summer Light
Quilt photography doesn’t have to be complicated. With a little awareness of timing, light, and setup, your summer quilt photos can go from “quick snap” to frame-worthy masterpiece. Whether you’re showcasing a new finish or documenting your quilt journey, take advantage of the beautiful light this season offers.
So grab your camera, chase that evening sun, and show off your stunning work—you made something beautiful, and it deserves to shine!
Do you have a favorite way to photograph your quilts?
Tag me or share your summer quilt photos—I’d love to see how you capture the magic!