There’s something about a warm mug in your hands during the holidays—hot cocoa, mulled cider, or that first cup of coffee on a frosty morning. Why not pair those cozy drinks with a handmade touch? Quilted coasters are quick to sew, use up festive fabric scraps, and make perfect stocking stuffers or hostess gifts. Best of all, you can make a whole set in an afternoon.
What You’ll Need:
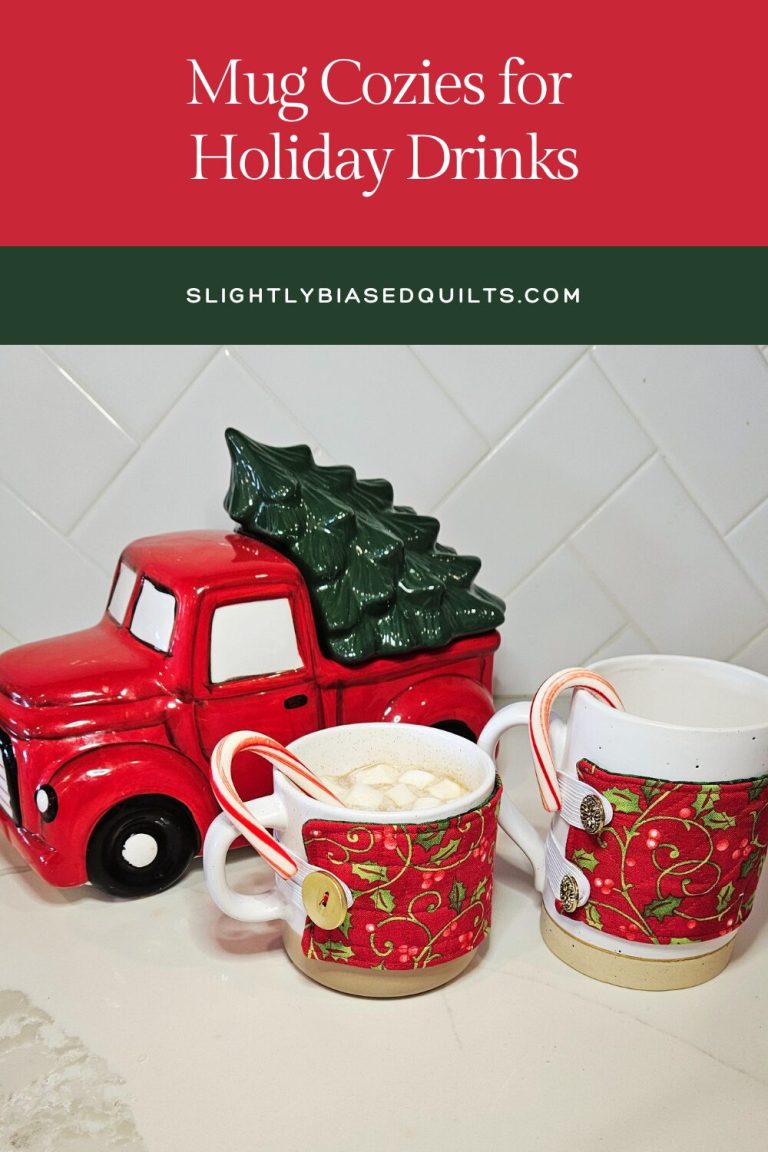
- Two pieces of fabric: About 3.5″ x 8.5″ each (leftover holiday prints like snowflakes or plaids are festive magic). Be sure to measure your mug to make sure it fits.
- Batting: A scrap piece the same size as your fabric (from that half-finished quilt? You’re welcome).
- Elastic: Two 2-3″ loops (hair ties work in a pinch, but 1/4″ elastic is ideal for durability).
- Buttons: Two per cozy, about 3/4″ diameter (matchy or mismatched for whimsy).
- Basic sewing supplies: Thread, pins, sewing machine (or needle and thread for hand-sewing), scissors, iron, and a turning tool (chopstick or knitting needle).
Step-by-Step: From Scraps to Snug
Grab your machine (or thimble), and let’s layer this cozy like a holiday sandwich. I’ll keep it simple with photos in mind—if you’re following along visually, snap pics at each step for your own Insta-reveal.
Step 1: Layer It Up
- Lay the batting flat as your insulating base—it’s the secret sauce for that toasty feel.
- Place one fabric piece on top, right side facing up (this will be your outer cozy).
- Form your elastic into loops (one for each side of the mug handle). Position the, with the ends facing outward toward the edge—this ensures they’ll get neatly caught in the seam.
- Top it all with the second fabric piece, right side down (facing the first fabric). Pin around the edges like you’re securing a love letter.
Your stack should look like a fabric burrito: batting bottom, fabric right-side-up, elastics looped in, fabric right-side-down on top.
Step 2: Sew and Turn
- Sew around all four edges with a 1/4″ seam allowance, but leave a 2-3-inch gap on one long side (this is your turning portal
—don’t forget it!). - When you hit the elastic ends, backstitch 3-4 times over them for reinforcement. No one wants elastic snapping mid-sip.
- Trim the batting close to the seam to reduce bulk—your cozy will thank you by lying flat.
- Reach in through the gap and gently turn everything right side out. Use a chopstick or turning stick to poke out the corners sharply. Voilà!
Step 3: Press and Finish the Edges
- Head to your ironing board. Press the entire piece flat.
- Close the gap with a quick topstitch along the edge, then continue stitching around the entire perimeter about 1/8″ from the edge. This gives it a pro finish and keeps everything from shifting.
Step 4: Quilt for Cuddles
- For that quilted texture (and to secure the batting), add quilting lines. I went simple with straight lines spaced 1 inch apart, sewn parallel across the width—like speedy railroad tracks.
- Feeling artistic? Swirl in curves, holly leaves, or wavy evergreen motifs. Just stitch through all layers with a straight or decorative stitch. Keep it under 30 seconds per line to stay in the “quick gift” zone.
Step 5: Button It Up
- Position your buttons opposite the elastic loops (they’ll act as snug fasteners around the mug).
- Sew them on securely: Hand-stitch for a rustic vibe (4-6 wraps per hole), or pop on a button foot for machine magic—zip-zap, done!
- Two buttons per cozy, and you’re golden. Test-fit on a mug; adjust if needed for that perfect embrace.
Easy Variations to Jingle Your Style
- Theme it up: Embroider initials, add jingle bells instead of buttons, or use felt for no-sew appliqués.
- Eco-twist: Swap batting for old towels or fleece scraps—zero waste, all warmth.
- Speed mode: Skip quilting for ultra-quickies, or pre-cut multiples for assembly-line fun
Wrap It, Gift It, Love It
And just like that, you’ve transformed scraps into stocking-worthy treasures. These mug cozies aren’t just cute—they’re the gift that says, “I thought of you while sipping my morning joe.” Batch ’em for the crew: Slip one into a jar with homemade cookies, cocoa mix, and peppermint stirrers for the ultimate “cozy kit.” Trust me, when someone unwraps this and slides it onto their mug, you’ll see eyes light up brighter than tree lights.
What’s your go-to holiday sip? Drop a comment below—I’d love to hear how these cozies jazz up your routine. Happy crafting, and may your holidays be merry, bright, and bulk-free. 🎄✂️
Pin this for later, and tag me in your makes—let’s spread the cozy!