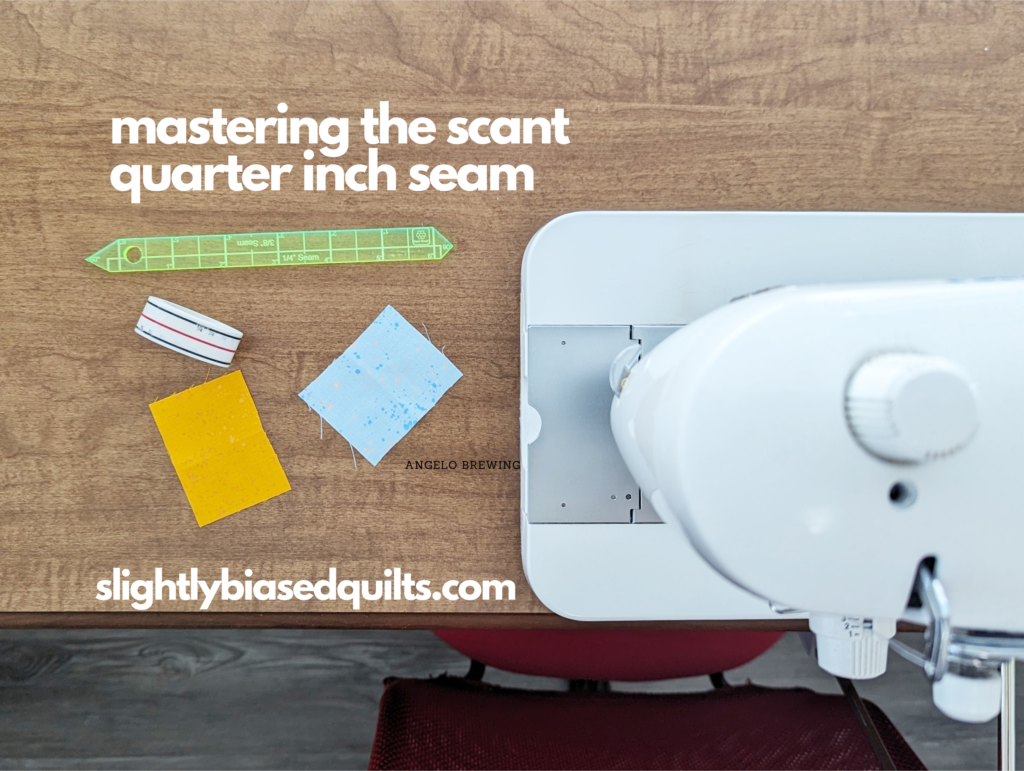
Hey there, fellow quilters! Today, I’m touching on a topic that might seem like a tiny detail, but it holds the power to transform your quilting game: the scant quarter-inch seam. Trust me, this is the secret weapon that can elevate your quilting projects from good to absolutely stunning!
Now, I know what you’re thinking – “What’s the big deal with a quarter inch seam? Isn’t it just a small seam allowance?” Well, my friends, it’s time to unravel the mystery and discover why the scant quarter inch seam is a quilter’s best-kept secret.
The Skinny on Scant
Let’s start with the basics. A traditional quarter-inch seam is a standard in quilting, right? Absolutely! But here’s the catch – a scant quarter-inch seam takes it a step further. Picture this: it’s just a hair less (think the width of a line) than a perfect quarter inch. Why, you ask? Because it accounts for the fabric that gets eaten up in the seam allowance during pressing.
Why Go Scant?
Precision Matters: Quilting is an art of precision, and a scant quarter inch seam is your ticket to accuracy. It ensures that your blocks align perfectly, creating a seamless and professional-looking finish.
Avoiding Bulk: Ever wondered why your seams feel a bit too bulky? A scant quarter inch seam is the antidote. It reduces bulk in your seams, making your quilt top lie flat and easing the quilting process.
Seam Allowance Insurance: Let’s face it – we all have our moments of excitement at the sewing machine and maybe use a lead foot to press that pedal. A scant quarter inch provides a safety net. Even if you veer slightly off-course, you’re still within the acceptable range.
Getting Down to Business
Now that we’ve established the importance of the scant quarter inch seam, let’s talk technique:
Precision is Key: Invest in a good quarter-inch foot for your sewing machine. It’s a game-changer. With a guide right at the edge, you’ll hit that sweet spot every time.
Test and Adjust: Don’t just dive into your main project without a trial run. Grab some scrap fabric, sew a test seam, and measure. Adjust your machine settings if needed until you nail that scant quarter inch.
Pressing with Purpose: Pressing matters just as much as sewing. Use a hot iron and press those seams open to reduce bulk. And remember, pressing, not ironing! Check out the blog here for a refresher on pressing.
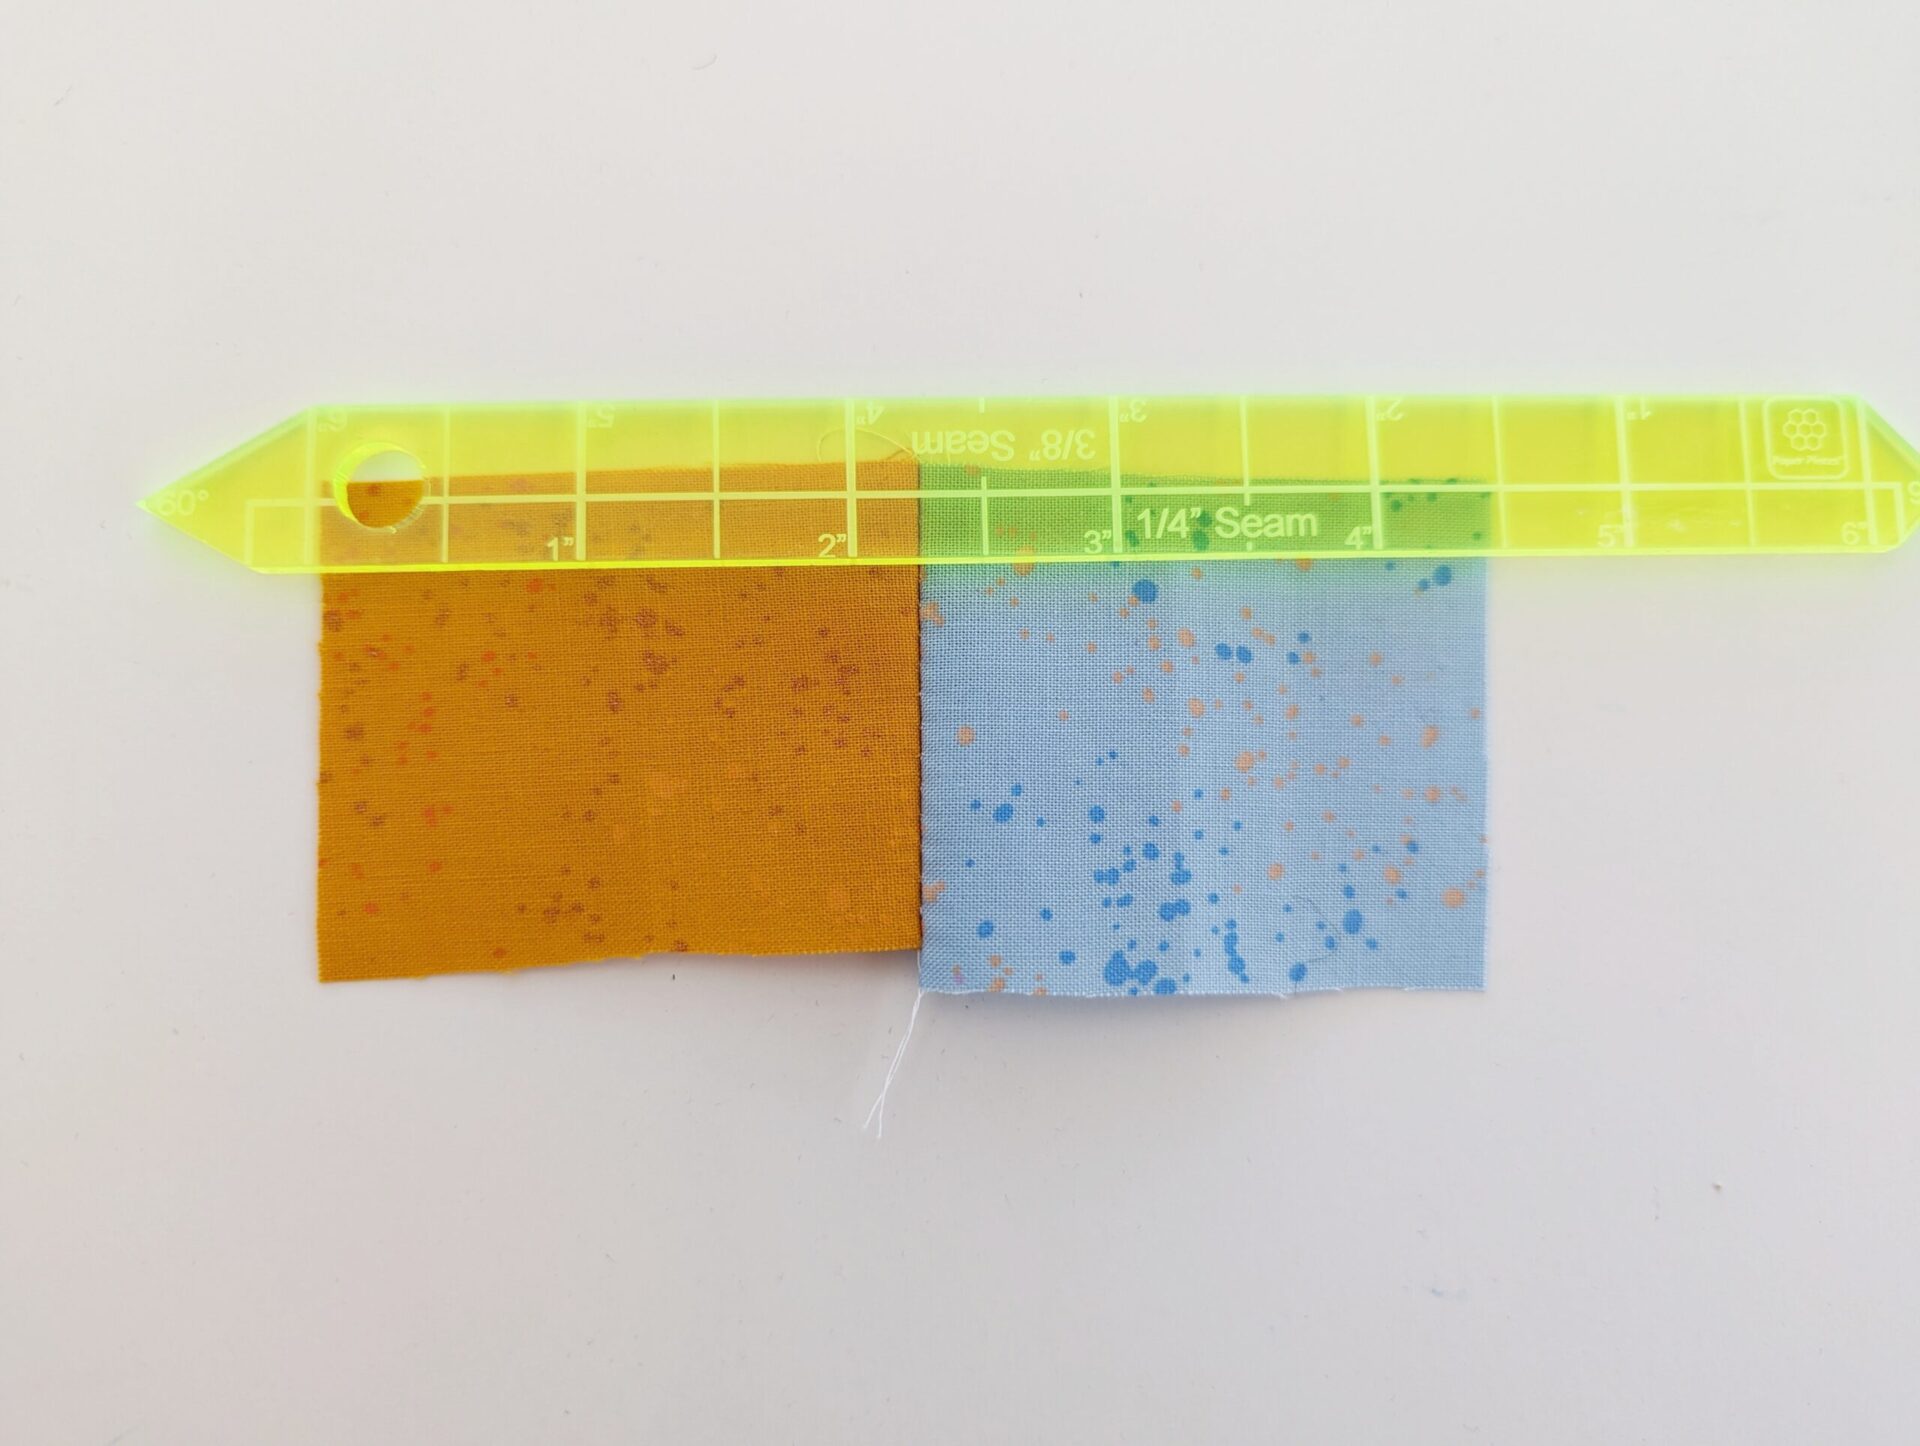
Measuring and Testing for a Scant Quarter Inch Seam
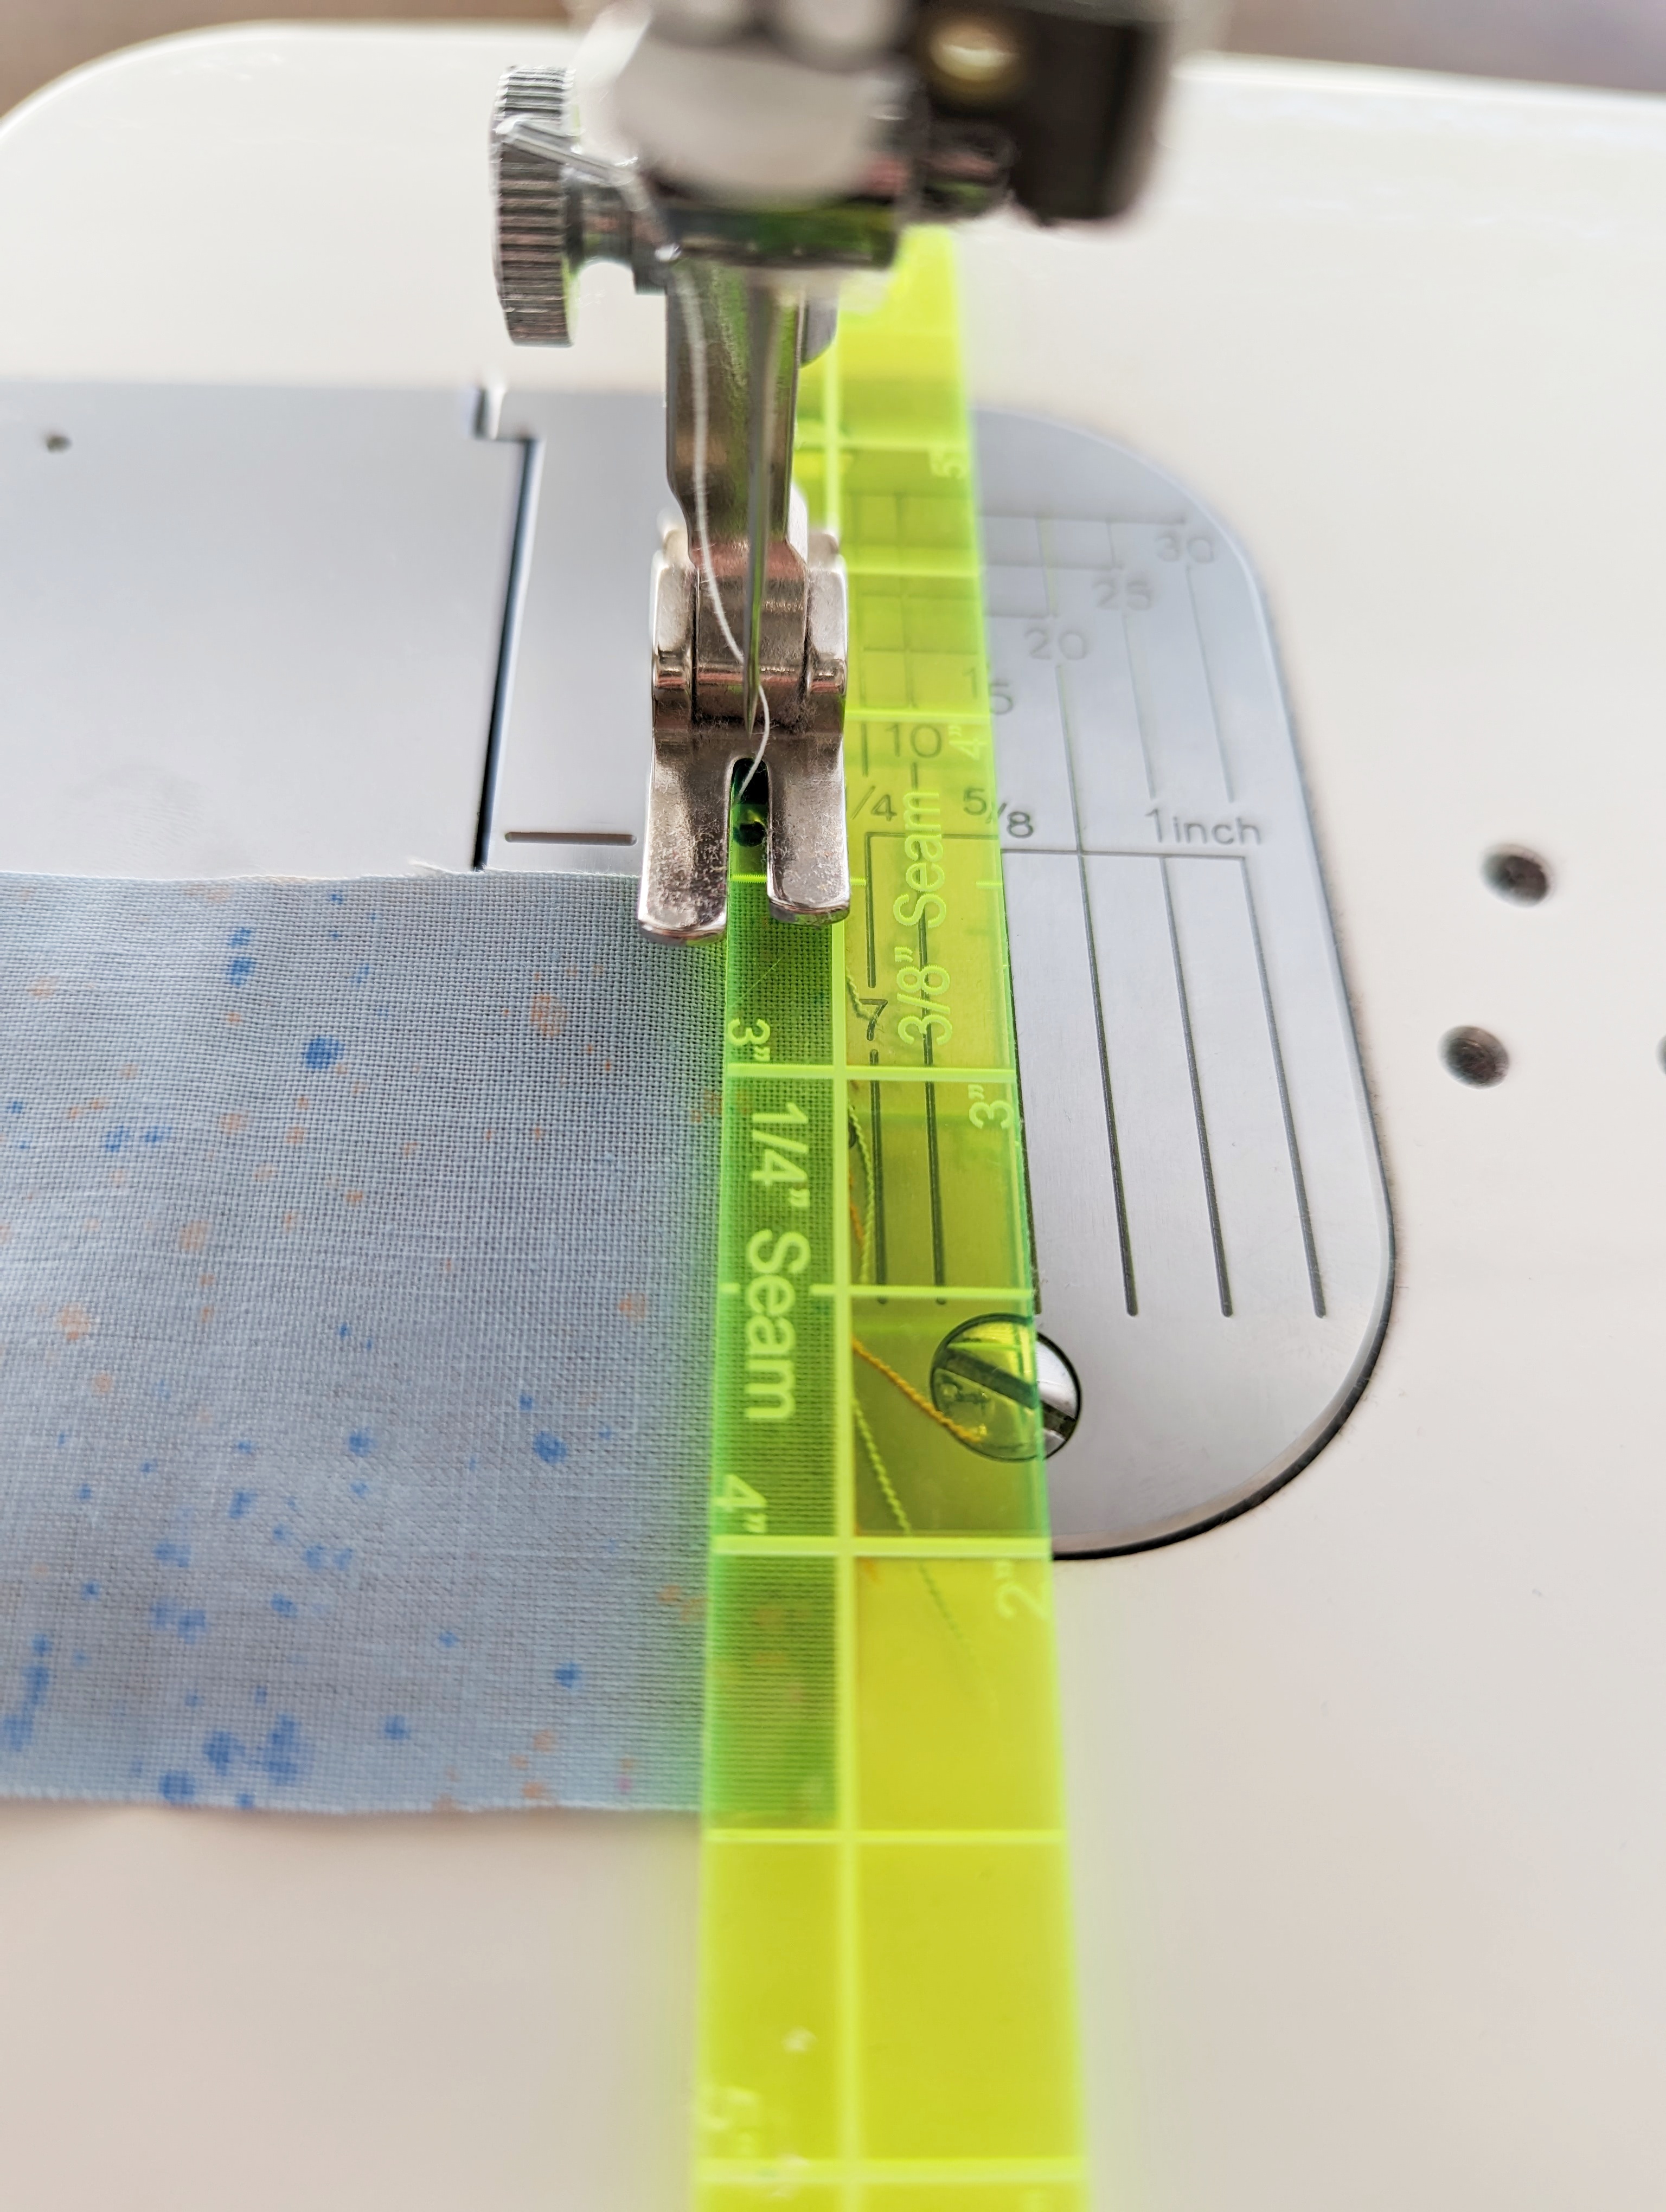
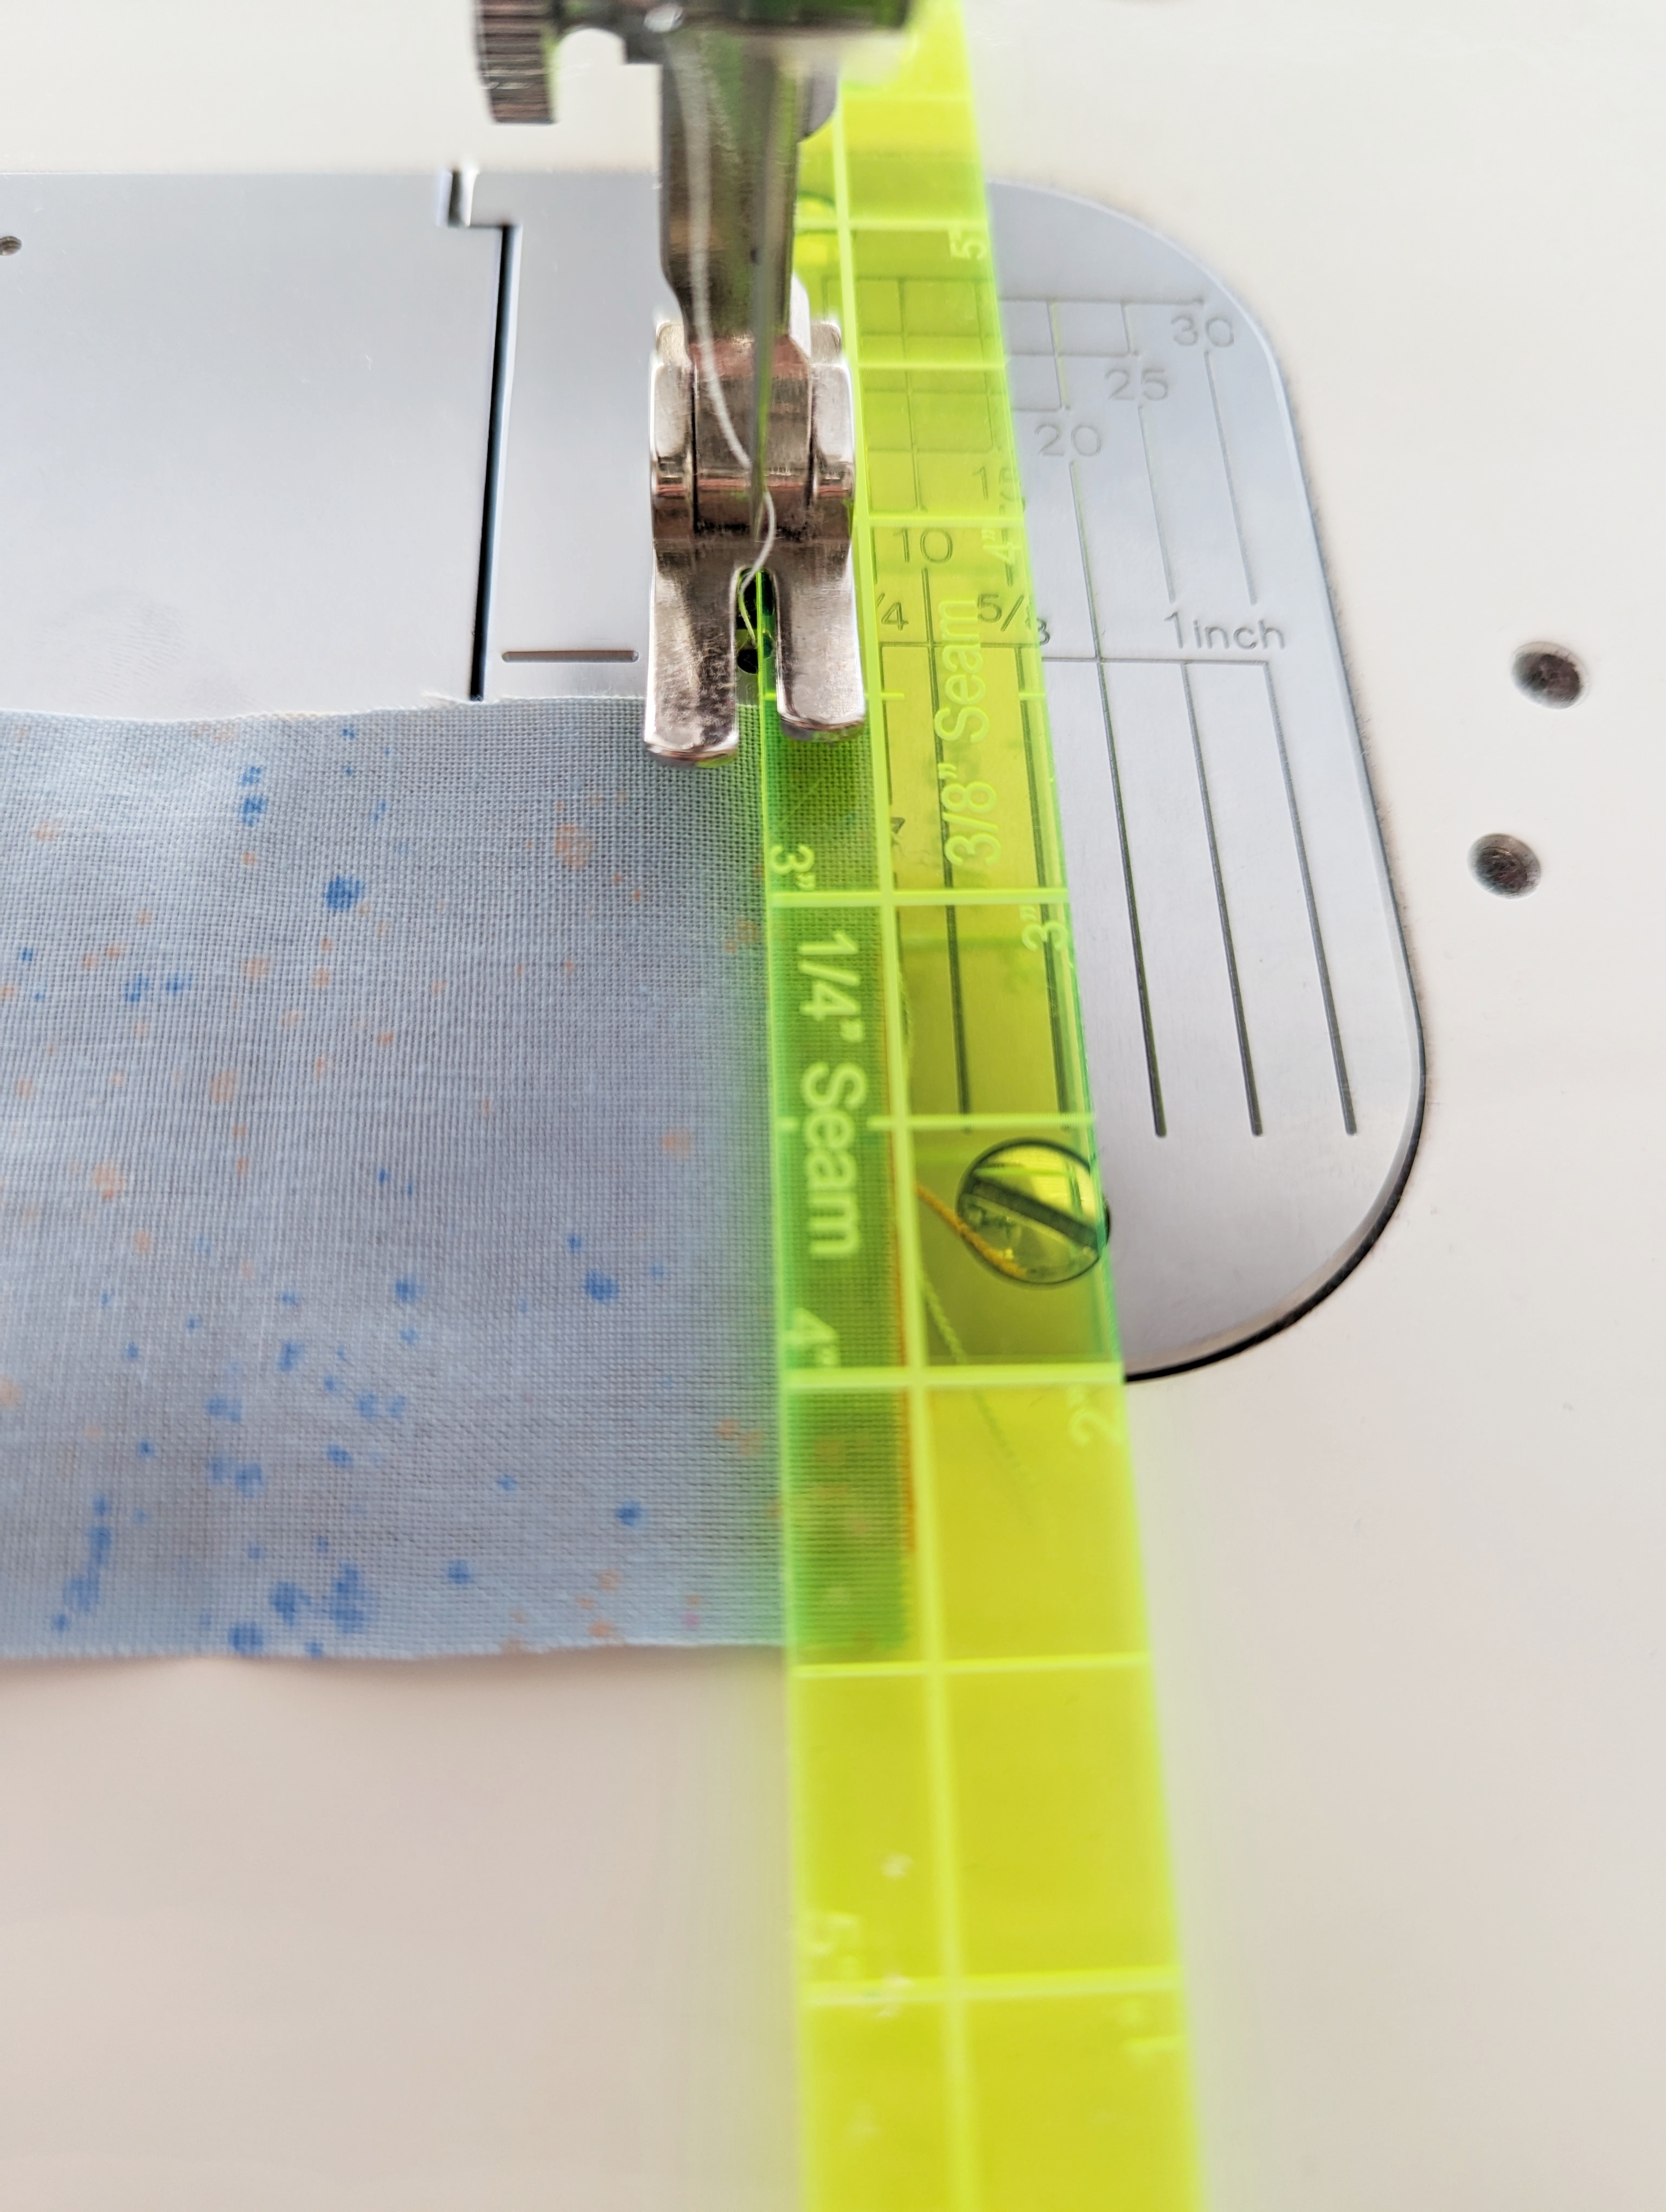
- If you have a quarter inch seam foot for your machine use it for this test. Using a small clear quilting ruler line up your ¼ inch mark with your needle and observe where the edge of the ruler is.
- Now move that ruler a hair to the left so the edge of the ruler is now “scant”. Use a piece of washi tape or a magnet and mark your new seam on your needle plate and move the ruler out of the way.
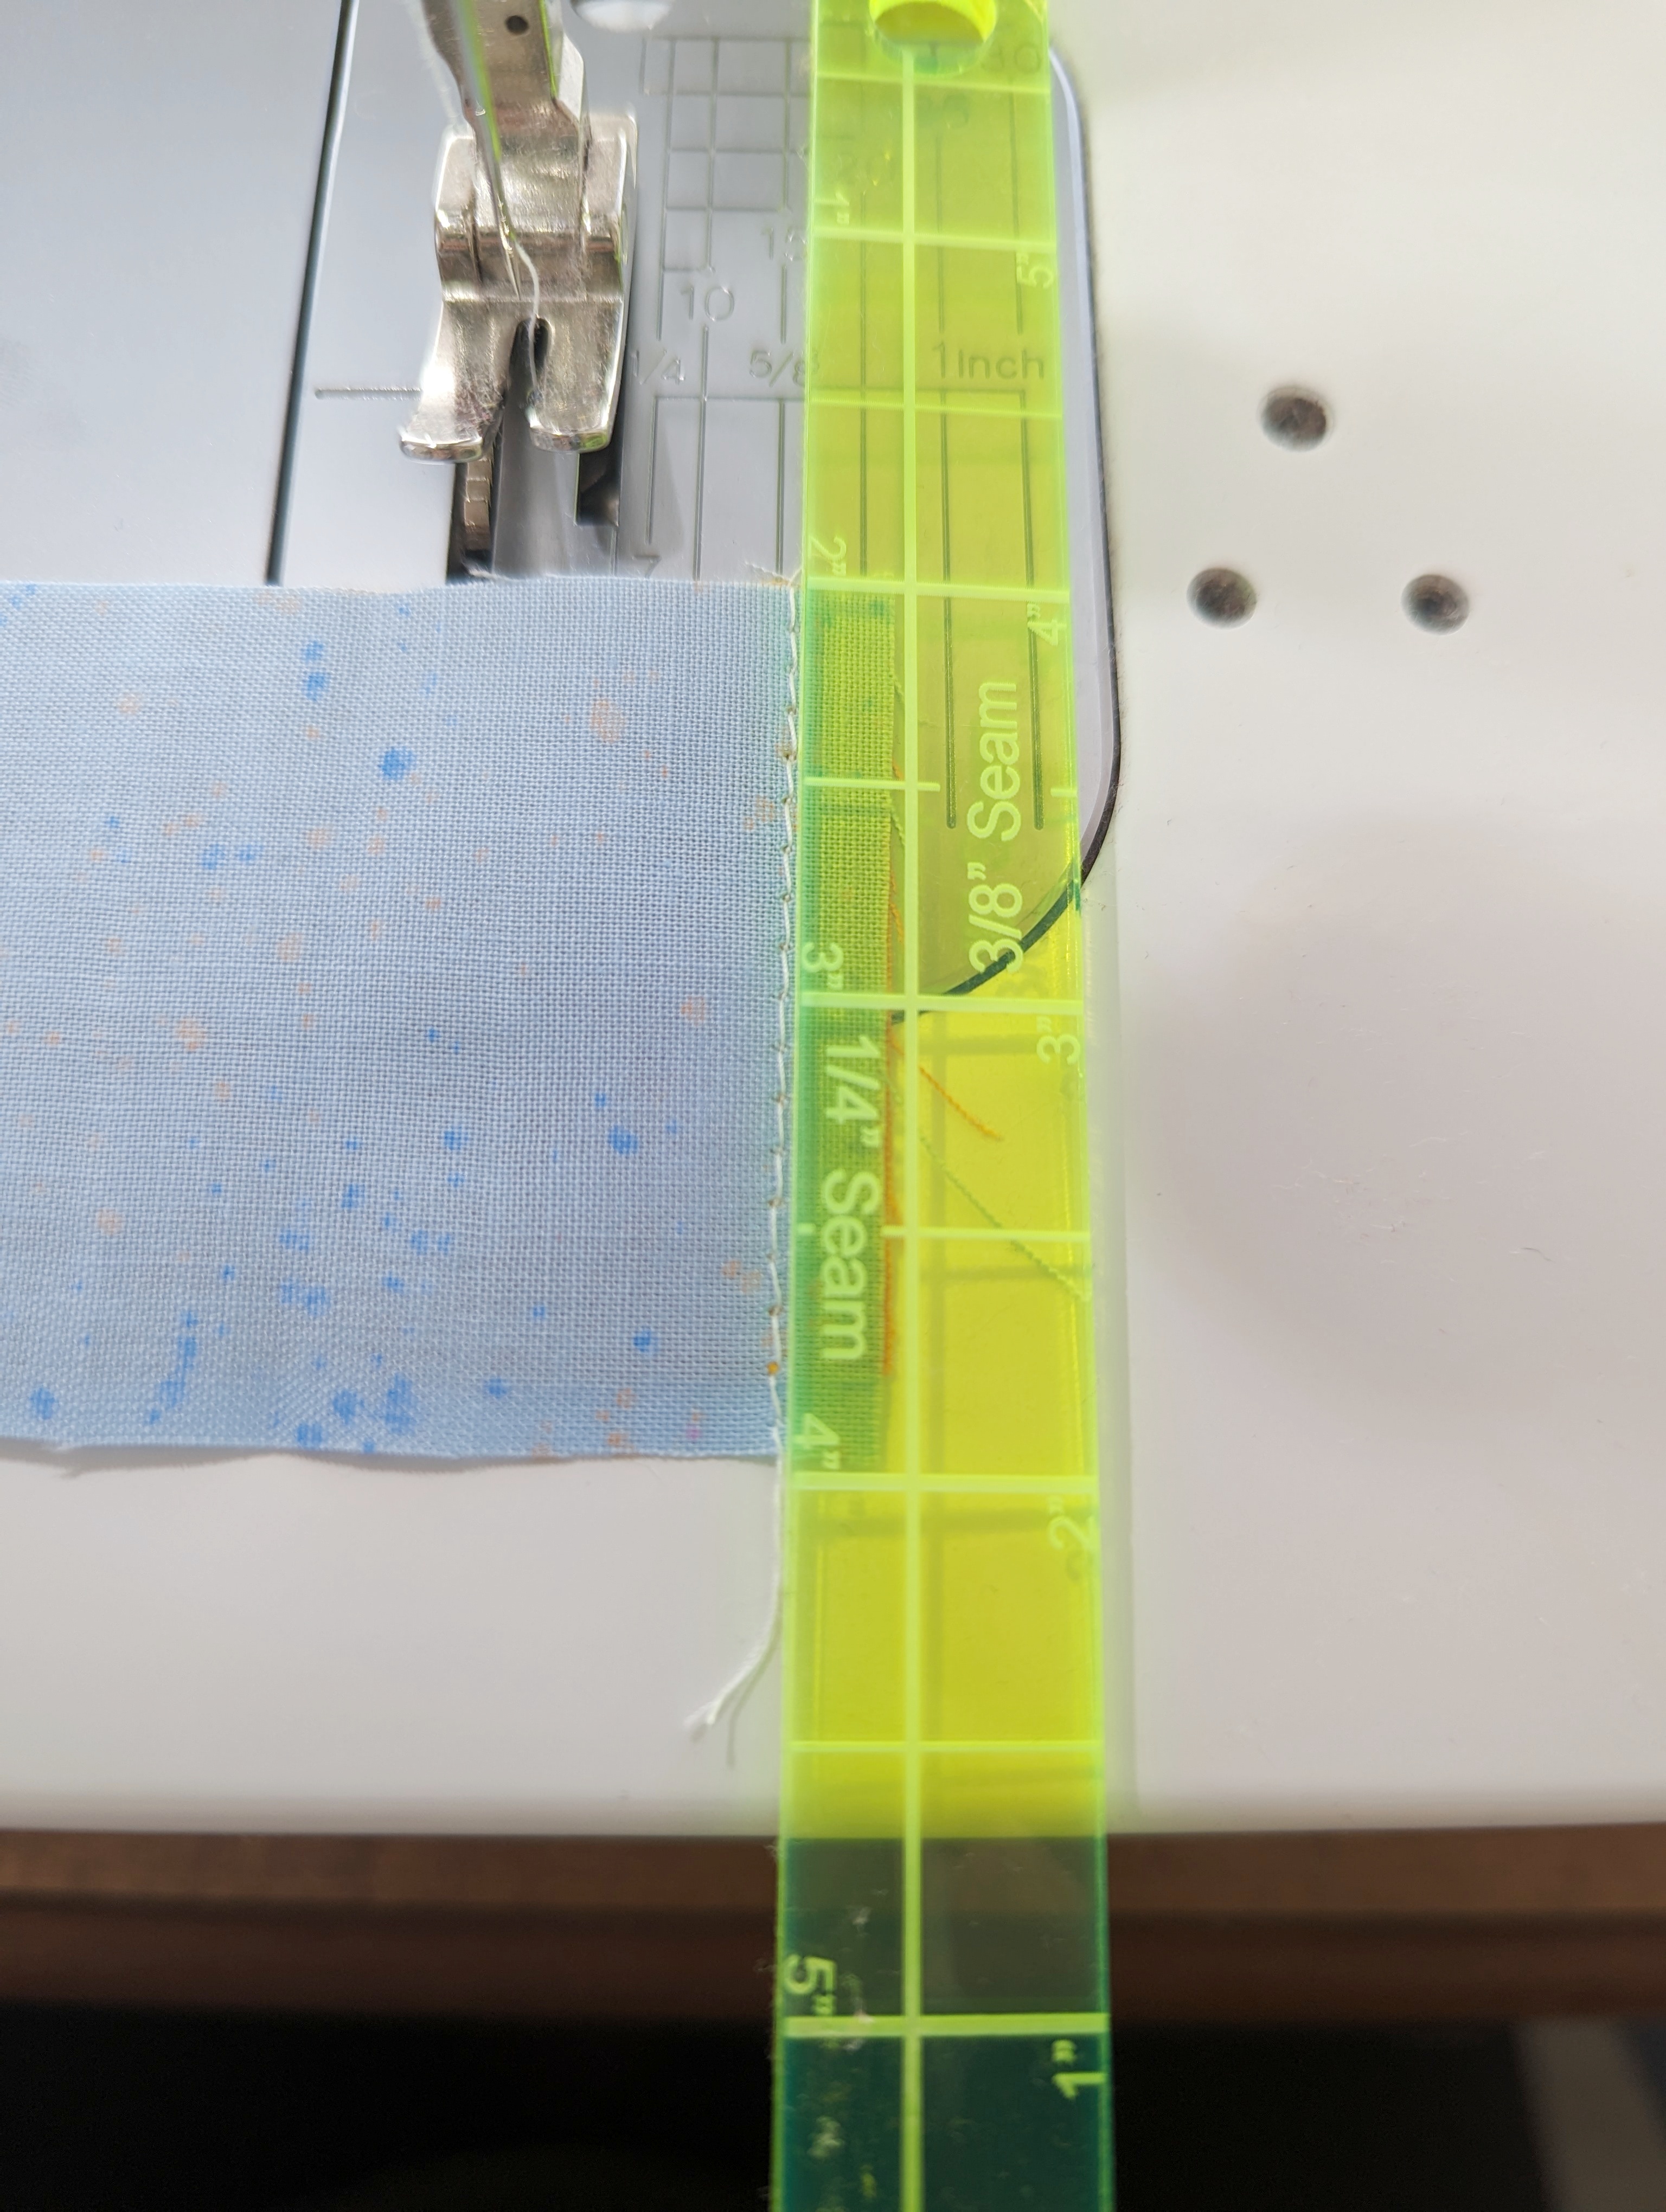
- Now test your new seam with the type of fabric and thread you plan to use for your project. Sew the seam and then measure the edge of the fabric to the seam to make sure it lands just shy of the ¼ inch mark.
- Press the seams and measure the sewn block to check for accuracy.
- Adjust in small increments until your final block comes out correctly.
The Scant Quarter Inch in Action
Imagine a quilt with perfectly aligned blocks, seams lying flat, and the overall aesthetic just singing with harmony. That’s the magic of the scant quarter inch seam at work. It’s like the unsung hero that holds everything together, quite literally.
So, fellow quilters, the next time you sit down at your sewing machine, embrace the power of the scant quarter inch seam. It might be a small detail, but in quilting, it’s the thread that can create perfection in every stitch.
Happy quilting, and may your seams be ever scant and your quilts ever fabulous! ✂️🧵✨